Brock House is a traditional block documented in The Quilter's Album of Patchwork Patterns by Jinny Beyer.
 |
| Brock House and variations for selvedge strings. |
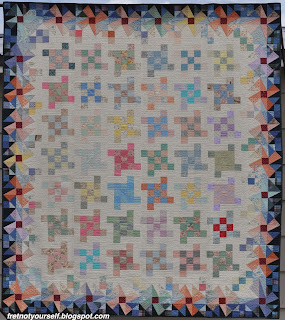
In some ways it reminds me of Sherri's Floating Squares: two small squares sewn together then joined to a larger square. When I simplified further (bottom left in the photo above) that iteration reminded me of Flying Squares, a quilt I made years ago using the bottom right block.
Brief directions for Flying Squares can be found here. These block designs all use partial seams. It's a very useful technique; not hard at all. Jinny Beyer wrote directions for partial seaming here and Laura Nownes (co-author of Quilts, Quilts, Quilts) created a YouTube video here.
I decided to try this with the skinny Selvedge Race. The selvedges are so busy that they seem to need solids. Here is what's on hand.
 |
| Flying Squares quilt |
I decided to try this with the skinny Selvedge Race. The selvedges are so busy that they seem to need solids. Here is what's on hand.
 |
| The solids in my stash. |
Finding a 4.5" orange remnant in my scrap bag from the back of this quilt, I freehand cut all the solids into squares about that size although a larger center square might look better. (Using what I have.)
 |
| Selvedge string Brock House variation |
In the photo above, I sewed a partial seam on the top left rectangle. Then sewed the bottom left rectangle all the way across, pinned the bottom right rectangle (ready to sew.) The top right rectangle is pinned on the solid only to ensure it's aligned with enough seam allowances everywhere.
I make a couple of stitches in place then tie the threads of the partial seams on the back of the block. Most people probably wouldn't bother but I hate the idea of threads coming loose.
I make a couple of stitches in place then tie the threads of the partial seams on the back of the block. Most people probably wouldn't bother but I hate the idea of threads coming loose.
 |
| Tying threads from partial seams on the back. |
Is this improv? Depends who you ask. I think of these as units. They are similarly sized but not identical. Joining strips will probably be needed to fit them all together. In some ways they may look like Kaja's Wall units - after all, they are smaller, square-ish shapes. In other ways they may look like Flying Squares... or something else entirely.
I am reminded of Anna Williams, an exceptionally talented Louisianan who found more time for quilting later in life. In her eponymous book, Nancy Crow wrote, " (Anna) built her quilt tops from parts and pieces, sewing smaller shapes together, then adding more shapes to make larger units. Her crowded bedroom housed stacks of small units, stacks of medium units, stacks of large units..."(p. 17) So there is a legacy of sewing units first, then using/reusing them as single pieces to build a quilt. [And, no. This quilt will be nowhere near as artistic as Anna's. But the IDEA of simply making units resonates.]
Two down. Now I'm cutting the rest of the narrow string sheet into rectangles.
The AHIQ Link-up is still open for a couple of days if you want to join in by linking up or just perusing the posts.
Enjoy the day, Ann