Showing posts with label how to make a t-shirt quilt. Show all posts

Tuesday, October 18, 2016

T-shirt Quilt Top Finished

There wasn't a single fabric that could frame all the t-shirts so I used a variety. Although each post is a pocket label - twenty of them - there were still more. They are scattered across the top along with other sections from the shirts.

Center of t-shirt quilt sewed

Then I sewed the border. I cut the fabric to include the entire circle but am considering cutting it partway off. I just need to maintain the proportion of the overall quilt.

University of Arkansas and Alpha Omega Pi t-shirts framed in light prints, sashed with red.
Partial view of t-shirt quilt with borders

My tenure as program chair is finished but still looking forward to Lisa Boni's lecture and workshop next week. I plan to make several Christmas presents using her design to decorate Altoid tin boxes.

Enjoy the day, Ann

Wednesday, August 7, 2013

Model T... T-Shirt, That Is

T-shirt quilts are highly individual but here's my basic plan, subject to all types of variation. A three by four grid of twelve-inch blocks with 3-inch sashing and a 4.5 inch border finishes 57 inches by 72 inches. I like wide sashing for three reasons: it adds color, it allows room for part-pieced/part-appliqued blocks and it gives more placement options for small applique pieces.

Twelve t-shirts with red sashing, blue posts and a border of multi-colored Texas Mink fringe.
University of Texas Delta Gamma t-shirt quilt
  • The sashing needs 31 rectangles cut 3.5" by 12.5". I buy 1.25 yards.
  • There are 20 posts cut 3.5" square. I buy a quarter yard or a fat quarter.
The sashing can be wider or narrower. Sashing on the pastel quilt in the Texas Mink post is much wider to include an entire bird while that on the Grumpy Cupid is slightly narrower (the width of one repeat.) Changing the size of the t-shirt blocks also changes the length of the sashing.

Borders with Texas Mink are 4.5" wide. Since the Mink covers the underlying fabric a pieced, un-mitered border will not be noticed. I buy 1.25 yards and cut seven strips the width of the 40" fabric. If you use a stripe or you don't want the lengths pieced you will need to buy more.

Default layout of t-shirt quilt. Border is not this wide.

Fret not; enjoy the day.

Ann

Saturday, July 6, 2013

Fill 'er Up: What to Add to a T-Shirt Quilt

T-shirts collections are scrapbooks of our past. The shirts spark memories - reminders of friendships and happy, meaningful occasions. The best loved, most significant t-shirts are the most used so they may be the most faded. I think t-shirt quilts look better with sashing and "full" blocks. Lovely new sashing fabric pumps color into the quilt and freshens the shirts.

Full blocks are also easy to achieve. Create a collage with a variety of shirts but don't forget the cutouts, stickers, ribbons and fancy paper that sets off photos in a lovely scrapbook. How does that translate into fabric?
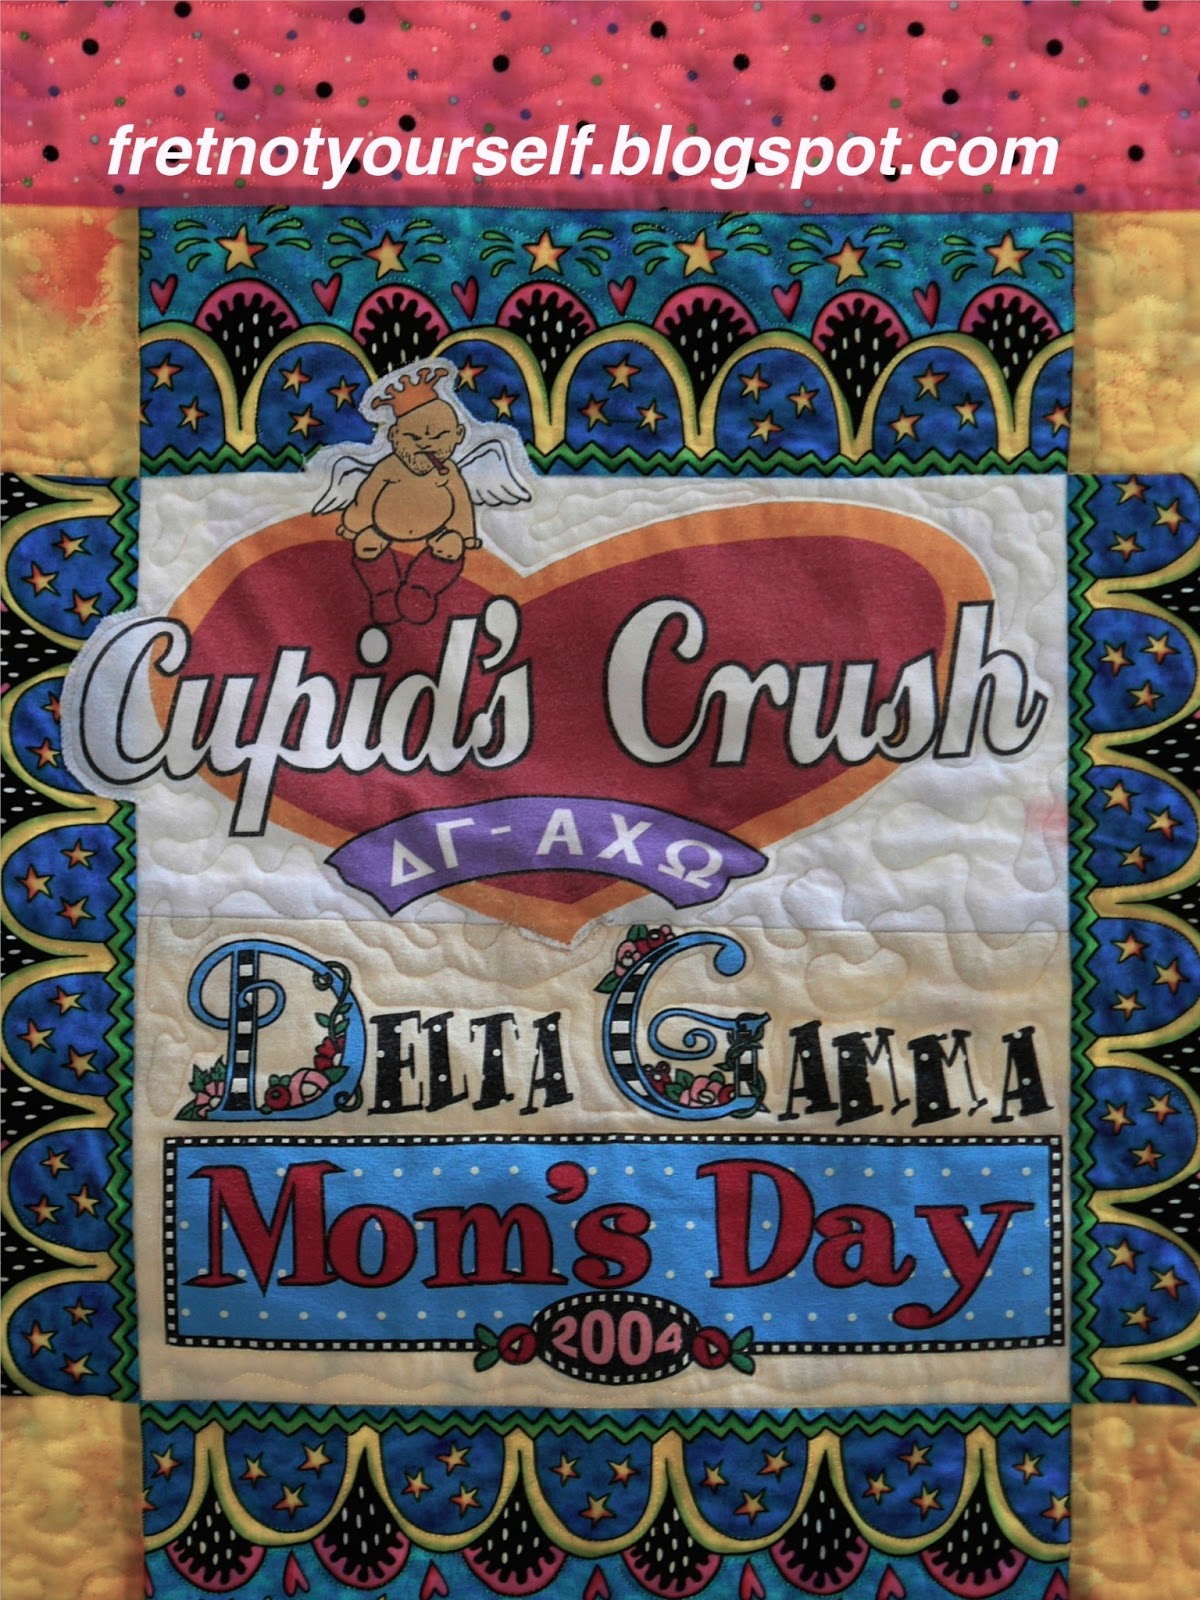
     1. Logos
Collect all the pocket, sleeve and collar logos leaving lots of blank t-shirt around them. Iron a generous amount of non-woven fusible interfacing to the back of all knit fabrics. Ask the recipient for favorite or meaningful shapes. For example, most fraternities and sororities have symbols such as kites, keys or stars. Create a significant shape and use it cut the smaller logos. Alternatively just cut around the logo. Or frame the logo with ribbon or fabric to really set it off. Then scatter them decoratively across the quilt surface.

Appliques of pocket logos and novelty prints add character to a T-Shirt quilt.

     2. Photos
Scan a photo onto fabric. Create a picture frame with colorful fabric and applique it to the quilt.

     3. Conversational fabric
There are fabrics for every sport, pet, musical instrument, food, method of travel, etc. If you know their interests, add them with a snippet of special fabric.


     4. Stuffed dolls or bears
This doll rests inside a shirt pocket. A ribbon with a snap keeps the doll on the quilt but allows removal for washing.

Pocket added to a T-Shirt quilt holds a small stuffed doll.

     5. Varsity letters, team patches, dance costumes, ball caps
Check Pretty in Pink and Writing with Thread. Carefully unstitch the letters and honor patches on a letter jacket. Add them to the quilt top. Zig-zag or blanket stitch with a regular or quilting thread (40-50 weight) to ensure they stay on. Quilt around these thick items, not over them.

     6. Practice shorts, boarding shorts, preschool shirt, swimsuit
Who'd have thought? You must plan ahead with something that will fill most of a block. Pick a plainer t-shirt like this and cut it with more space above or below the logo to allow room to add the shorts without covering interesting designs on the shirt. Cut the shorts in half; pin to the top; pin a very generous seam allowance. Go back and increase the seam allowance of the shorts. When you reach the point where shorts look ridiculous, let the seam allowance out a bit. Clothing wraps a three-dimensional figure and you're reducing it to two-dimensions. Believe me, she'll thank you!


     7. Award ribbons
Despite encouraging people to use anything on a quilt, I am very wary of using award ribbons. They are usually printed on acetate and do not hold up well in the wash. If you choose to add them, make them removable like the doll above.

I'd love to see what you create.

Fret not; enjoy the day.

Ann

Wednesday, June 12, 2013

Racing Out of the Block


Do you remember Pretty in Pink? I also made a quilt for her sister who wanted her favorite nightgown included. It was very faded and worn so I cut it into hearts, put pink fabric behind and scattered them across the surface. Names of family members and favorite pets were machine stitched onto some of the hearts.

Nightgown hearts near pieced & appliquéd block
This t-shirt block required the most applique... and the most effort to keep the quilt flat. I think racing the car out of the block looks pretty good, though. I pieced two and a half sides and left "flaps" that I pulled through to the front and machine appliquéd onto the sashing. See Part Piece/Part Applique for a short tutorial on this method (although a smaller flap would be easier the first few times.)

Fret not; enjoy the day.

Ann

Saturday, May 25, 2013

Part Piece/Part Applique T-shirt Block

Like Goldilocks and the Three Bears, some t-shirts are too large, some are too small and some are just right. The "just right" ones are easy; you know what to do. But what about the others?


If they're too small, use several to make one block. I sandwiched three narrow logos below. After each is stabilized with fusible interfacing, cut them generously. Because they are so thick I use a half inch seam allowance when sewing two knits together. Trim the new block to the correct size afterwards.


It's really fun when they are too big! Piece and applique the shirt. Draw the normal finished size on the back with washable marker. Then sketch where you want the seam around the extended part. Carefully cut the normal (pieced) section with its seam allowance and hand cut around the extension (applique.) Pin to the sashing and sew as much of the block as possible.

Piece the rest of the quilt as usual including the other blocks, sashing & posts. It will look like a regular top except for some unsewn places. Press the top.


Carefully cut the shirt to the end of the sewing line.

Cut carefully to the point where the sewing line ended

Turn the quilt so the top faces up. Gently pull the unsewn portion to the front and pin in place.


Check that the quilt is flat. Check again! Machine applique the t-shirt flap to the sashing using zig-zag or blanket stitch.

A little of both? The photo at the top contains my two favorite shirts. This grumpy, little, cigar-chomping angel always makes me laugh. Since both designs were narrow I sewed them together. But look carefully. The heart point is appliquéd into the top of the Mother's Day shirt. Then the angel is appliquéd to the sashing. Double the fun.

I'd love to see what you create! Let me know if you use this idea.

Fret not; enjoy the day.

Ann