Showing posts with label string tulips. Show all posts

Tuesday, July 13, 2021

String Tulips Quilted and Gone

Earth provides enough to satisfy every man's needs but not every man's greed.
~Mahatma Gandhi

Quilting


Taking a {hopefully short} break from the baseball quilt. Family members asked for quilts for their friends having babies and this quilt was the easiest to finish up. The top was completed in April. It's better to quilt them soon after. What looked good becomes indifferent with time. 

String Tulip baby quilt 3

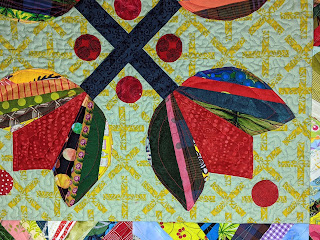
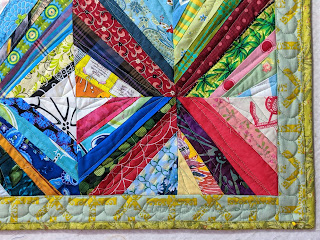
The tulip petals are outlined and echoed. The white background is stippled.  

String Tulip 3 stipple quilting detail

The ESS blocks are free-hand quilted in a zig zag design that moves easily from one to the other because nothing shows in all this business. 

String Tulip 3 zig zag quilting detail

The outer border is a free-hand loop. And it's done.

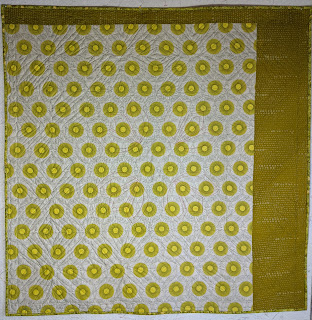
The back is three purple {approximately} half yard pieces sewn dark to light. Not clever but easy and adds more color. Because this quilt was so quiet... ;-)

String Tulip 3 quilt back


One more photo of it folded ready to roll into a mailer.

String Tulip 3 quilt folded

Quilt Specifics
Size: 47" x 47"
Design: String tulips and string block border
Batting: Mountain Mist Cream Rose cotton
Thread: Gutermann 50/3 light and dark green cotton thread
Quilting: SID and FMQ
Approximate yardage: 6.5 yds

Previous posts:

It's already reached its forever home and will be well loved. Several more have been requested. I need to search out some stashed blocks and bits. 

Enjoy the day, Ann

Tuesday, April 6, 2021

String Tulip QAL Month 3

A party without cake is really just a meeting.
~Julia Child

Quilting


So many household repairs needed attention that it was hard to push forward on the tulips. How did you all do? It's no problem if you're behind; we're all working at our own pace. And several quilters have branched in their own directions. For example, Kaja pieced tulips and Julie created an applique so lively I can see the blooms blowing in a breeze. Not only are her colors gorgeously bold, but her tulips are strung horizontally across the petals rather than vertically. Be sure to take a look.

Although I'm sharing directions, this is improvisation. Do what you want whether they are tulips, strings or something completely different. My directions are there simply to help people who are more hesitant and the many people who asked how I made the ESS blocks. 

This month we'll appliqué the center and put the top together. As usual, these are just suggestions, hopefully enough to get beginners started. There are many ways to accomplish these steps; this is just the one I used. Look at YouTube for other methods.

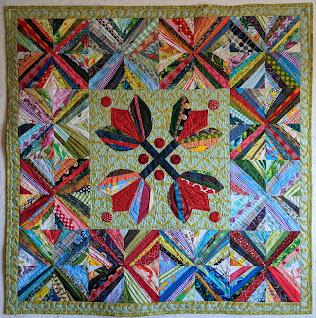
String Tulips quilt

Sew the Borders

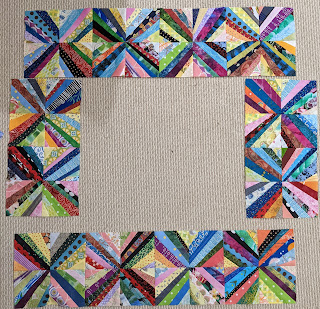
We left off with the center cut two-inches larger than the finished dimensions of the ESS blocks. Remove the paper from the ESS blocks and lay them out as a border. Sew the four sides together so the lengths can be verified. Press the borders carefully {NO ironing and NO steam} because all the sides are bias. 

For ESS string block borders sewn

Find the Center

Once the length is established, fold the center {that  was cut an inch or two wider} into quarters and press. 

Center of String Tulips is quartered and pressed

Marking a perimeter keeps the tulips from creeping into the seam allowance. The center may shrink up a bit once the appliqué is done which is why a washable marker was chosen and why we added an inch or two extra to the center. If your string blocks are a different length than mine, change the measurements.

Center the ten-inch marks of the ruler on the center crease then draw the perimeter with the marker. {Or half your personal border width.} Repeat for each quarter of the center. 

Marking the center perimeter with ruler and washable marker

Prepare Tulips

Previously I needle turned the tulips but this time I hand basted the seam allowance. Or use raw edge appliqué or any other method.

Basted seam allowance of tulip

When they are all ready, pin them to the center background. Eyeball the location or measure with a ruler as long as they are inside the marked line. Try to position the center petal along the main diagonals with the point toward the corner.

String Tulips pin basted to the center

Prepare Stems

Measure the diagonal distance between two tulips to calculate how long the stems will be. Add an inch or two to slide under the flower bases. It can be trimmed back later but it would be a shame to run short.

For sturdy stems use binding remnants. Stems can easily be changed to any width you like. Mine were cut 2.25-inches and finish about 1.125".

Stems don't have to be green. Try unexpected colors to see what happens. 

Four possible stem choices for String Tulips

Open the binding and press both edges to the center. 

Pressing the tulip stems


Position the Stems

Fold the stems in half to locate the centers. Place the centers of both stems on the center of the background and extend each stem diagonally so they make ninety degree angles. Pin or glue the bottom one down. Pin or glue part of the top one down but leave one side loose to fold it back while sewing the bottom one.

Pinning the stems in place

Once you know there is sufficient seam allowance for the stems, tuck the ends under the tulips. 

Check that everything is well placed. If you are adding leaves, etc, lay those templates temporarily in place to ensure there's enough room. Adjust as needed {which could mean scooting something over or increasing its seam allowance. Note: A narrower tulip like Julie's {link at the top} leaves more room for additional appliqué pieces. Think about it.

Appliqué

Use your machine's edge stitching foot or blanket stitch to appliqué the bottom stem, starting and ending  under the tulips.

Applique the stem under the tulip

Then repeat with the top stem. 

Applique the tulip stems

Finally stitch around each tulip. Choose thread to match your fabric or not. I found it easier to start at the top right point. Slow down at the base where there's a wad of seams. Repositioning the presser foot by lifting it momentarily will help ease the sewing.

Applique the tulips

Add Additional Appliqué

I added eight circles but you could add anything you want... or nothing at all. Since I own a set of Karen Buckley's Perfect Circles, that's what I used to choose circle sizes. Look around your house for any circles... bobbins, spice bottles, etc. Place your templates on the background to check the size.

Possible circle templates

These fabrics from my stash repeat colors on the white print. I cut a few of each to test which would work best. 

Possible circle fabrics

Cut them out, then pin or glue them in place. Check the position then appliqué them in the same way as the tulips and stems.

Adding a circle above the tulip

Sew the Borders to the Center

Once all the appliqué is finished, it's time to re-measure the center. This time, mark the cutting line. In my case, that's a perimeter 10.25-inches from the center for each quadrant. I lined the ruler up with the 10.25 line on those pressed lines on the background. 

Mark the new sewing line for the center section

The appliqué pulled my center in about an eighth-inch. As a check, the cutting line you are marking now will be a quarter-inch or more than the previously drawn line.

Then cut the center along that line, pin the borders to opposite sides and ease them onto the center.

Add Outer Border

The ESS blocks are all bias so I added a narrow outer border to stabilize the quilt. {The other choice is to stay stitch an eighth-inch from the edge.} Cut strips 1.75-inches by WOF and seam together as needed. My first two sides are 40.5", the length of eight ESS blocks plus two seam allowances. The second two sides are 43". Measure your blocks to determine your personal lengths.

String Tulip 3 quilt top

Pin or mark the length and the center then pin each to a side and sew.

Ta da! Top done!

On a personal note, I'm fully Pfizered. Hopefully everyone will be vaccinated soon, the only way we can kill off this virus.

Enjoy the day, Ann

Tuesday, March 2, 2021

String Tulip QAL Month 2

The main thing is to have a gutsy approach and use your head.
~Julia Child 

Quilting

Welcome to the second month of the #AHIQStringTulipsQAL. How did the first month go? I anticipate many inventive variations of the ESS blocks. And explosions of color and creativity. 

Three people have already shared the blocks they've finished to date. Look at them all and compare how the choices they made change this block. Each has interpreted the basic directions to suit herself. None is "more right" than the others. It's simply a matter of choosing your own way.
  1. Sharon at ascensionheart already finished all her ESS blocks. Wow. Her light sides make the Xs stronger and the colors are bright and cheerful.
  2. Maureen posted hers on MysticQuilter as well as on the AHIQ blog. If you read her blog you'll know she's a master gardener and this shows in the sophisticated prints and selections that make her Xs look like flowers in bloom.
  3. Kaja's blocks frequently use of a blue and white plaid at or near the center strengthens her design. Her free-spirited placement of values make the Xs weave from side to side.

This time we'll decide on the center background, and cut and sew the tulips. More thinking this month and a bit more time to finish the ESS blocks. 

String Tulips quilt

Size the Center

Before making tulips, we need to calculate the size of the center of the quilt and choose a background that works with the borders. Remember we are working like a kawandi - from the outside in. Measure your blocks to determine the center size. For my baby quilt, the sum of four string blocks finished is the finished size of the center. Add seam allowances. 

Then add another inch or two because sewing the appliqué often causes the base fabric to shrink a bit. Just remember to re-square the center when the the appliqué is finished. {I learned that from Audrey. Thanks!}

My blocks are 5.5" unfinished or 5" finished. Four of them equals twenty inches finished or 20.5" for the unfinished length. I cut my center 22" and marked a 20" perimeter with washable marker inside it to locate the maximum extent of appliqué. If it pulls the center in, there will still be a bit more "open space" before that seam; i.e., the final seam will be between the marked line and the outer edge.

Choose the Background Fabric

Over-planning kills creativity. My quilts are more creative when I just play with the strings first. The end result is much freer than if I plan the center and try to match strings to it. So now that you have a free-spirited collection of blocks, look through all your stash with open minds for unconventional and unexpected combinations... as Rod would say.

A twenty-two inch square is larger than a fat quarter. Some choices. 
  1. Use a larger piece of fabric like String Tulips 1 which I cut from 2/3 of a yard.
  2. Piece the background from a single fabric like String Tulips 2 where I sewed the extra width from a half yard to enlarge the background.
  3. Piece several different fabrics together. These could be four quarters or an off-centered arrangement. Audrey’s Seedpod quilt is a lovely example. 
  4. Sash the center.
  5. Think of another way yourself.
Lay the ESS blocks around an open center and place different fabrics inside until you find one {or more} that pleases you. It's surprising what pops so try many values and colors. Don't worry about the tulips until the background is settled.

Create Tulip Templates

Because the crossed tulips are radially symmetrical, I only needed a quarter of the design {in my case that's ten inches of paper} to plan my tulips. I taped two sheets of graph paper together, marked off the side measurements and added a main diagonal to keep it symmetrical.

I wanted three separate petals that filled up most of the space. My working sketch shows how I enlarged the tulip repeatedly to fill the area and create larger outer petals. If you don't want such full-blown tulips, adjust your sketch. Paper is cheap.

Tulip sketch fills
a quarter of the center

If you choose to use leftover ESS blocks as your side tulip petals {as I did}, double check that the templates {and seam allowances} fit inside a scrap block by laying them out and making sure there's room for the seam allowance. Here's mine laid over a string block on my light table. 

Checking template size against ESS block size

Once the tulip looked okay, fold the sketch along the diagonal and cut both sides at once, choosing the side that looks better to you as the cutting template.  Or make both sides different. You're the designer here.

Tulip template folded and cut

Trace that tulip on a new sheet for backup. Adjust as needed. {That's where the copy came in handy.}

If you want room for additional applique {such as those circles, leaves, or birds which may be centered between two quadrants} make the tulip smaller.  If you don't want to use ESS blocks for a petal, the templates can be longer. A narrower center template will draw the tulip together. 

Templates with seam allowances on all sides

When you're satisfied, cut your template into the three pieces, trace them, and add seam allowances. If you choose to raw-edge applique your tulips, they only need seam allowances between the petals themselves.

You are welcome to use my tulip template for a twenty-inch center. Cut and add seam allowances as required.

Pick Tulip String Colors/Values 

Consider what values will show up best on your background. The green and chartreuse center of String Tulips 1 is a dark medium which meant the tulips needed to be much darker or lighter to contrast. The medium values of most of my ESS blocks got lost. So I sewed more blocks before making all the tulip petals. {That's how the black tulips were born.} On the other hand, lighter tulips fit String Tulips 2. No new blocks were needed. 

My current ESS blocks work well with the pink background but the prepared tulip {in the middle} gets lost. If I want to use this background, the tulips should include strips like the dark set or possibly the whites. 

Strip choices for tulips
against a pink background

Determine Strip Direction

Most antique tulip quilts run the strips across the petals but I ran them vertically the length of the petal. What would other directions look like?

Tulip petal template on ESS block

Warning 1: Because several seams crowd the bottom of the tulip, vertical seams can make it difficult to turn a seam allowance on the outer edge. If you choose vertical strips, try to space them so bulky seams are minimized. Remember there are two more seams when you sew the three pieces together.

Warning 2: The 1.5" rule for the corners of ESS blocks applies here, too. Is there enough room to turn the last string under or will it just be multiple seam allowances?

The center petal can be more strips running the same direction or perpendicular. Or it can be a single piece of fabric. {I chose the latter.}

Pin the templates to your fabric or strip sets and cut them out. OR cut paper templates and sew new strips on top of each of the eight petals, remembering that the side petals of each tulip are mirror images. 

Two string tulip petals,
back of left side and front of right side

Prepare the Tulips

Sew the side petals to the center petal. Pin together matching start and ending points. Start a few stitches from the first pin and backstitch to it. 

Backstitch at the beginning
and end of the seams

Then sew straight to the final pin and backstitch a few stitches. This stabilizes the sewing and makes turning the seams under an easier task. 

Stabilized seams with
more ease to turn seams

I folded and pressed seam allowances around the tulip. I like the end result but it is bulky. There are many other choices. You can needle turn the tulips, finish with raw edges, sew them with interfacing and turn. What else? Use a method you like. And I'll try to write more about this process.

Tulip on light background

Next month we'll attach stems and tulips to the background. In the meanwhile, play with your ESS blocks and choose an exciting background. Then seriously consider the strips that would create a showy tulip. 

 There are many ways to imagine the center. Consider what else you want to add and make sure you have enough room. There was a beautiful applique quilt from Pennsylvania at the American Folk Art Museum a few years ago. Do any of these motifs strike a spark with you? Would your tulips prefer to be in a vase or set individually? Have fun!

Reading

PBS picked up a new series from the BBC, a remake of All Creatures Great and Small. I've been watching weekly. The scenery and costumes are wonderful, the cast is great. The storyline is still amusing and has been updated to include backstories of the women. {And the original series is still good.} It inspired me to re-read James Herriot's memoirs about his Yorkshire veterinary practice which started  in the 30s. It's a respite for these past few weeks. 

Vaccines

As I drove by the VA on my way to pick up groceries I saw a long line of cars extending into the street and around a corner. Of course I slowed down for a looki-loo and am sure it was a vaccine site for our veterans. Congratulations to them all!

Enjoy the day, Ann

Tuesday, January 5, 2021

AHIQ Prompt January 2021: String Tulip QAL

"Hope" is the thing with feathers -
That perches in the soul -
And sings the tune without the words -
And never stops - at all -

And sweetest - in the Gale - is heard -
And sore must be the storm -
That could abash the little Bird -
That kept so many warm -

I've heard it in the chillest land -
And on the strangest Sea -
Yet - never - in Extremity,
It asked a crumb of me.

~Emily Dickinson 

2021 opens so hopefully. Here goes!

Quilting


As always, many ideas for a prompt run through my mind but something different kept coming to the top. Repeated comments about the angled strings and the tulips gave me the idea for a quilt along instead of a prompt. So this time, let's have an Electric Socket Shock QAL. I was asked if there's a pattern. Answer: Of course not. I was making it up every step of the way. But it's a simple variation of a string quilt and those are always useful for clearing out the scraps. And it will force me to write something down.

Electric Socket Shock quilt


I'll start writing guidelines for us and we'll head out. Remember, they are merely suggestions. Change anything you want or go in a completely different directions. That's why we love improv.

Interestingly the tulip quilts were constructed like kawandi. I started with the border and worked my way in. So we will do the same with this QAL. We will start with the string blocks and then move to the string tulips. You can make one or both parts and add your own variations. 

String Tulips quilt

My previous quilts are about 40" square - baby quilt sized but you should choose a size that works for you. The final size will determine how many blocks you need to make. And BTW, my blocks were 5.5" unfinished/ 5" finished. Feel free to change those up, too.

You'll need assorted strings and scraps, about 2/3 yard for the background {more if you make a larger quilt}, and some leftover binding for the tulip stems. Or you can pull from your stash. Or go shopping. I also used newsprint for a base. You can do that, or nothing. If you sew with a fabric base, you should increase your seam allowances due to the extra bulk.

Are you in? Let me know in the comments. If it's a go, we will start sewing next month and continue monthly.

Enjoy the day, Ann

Tuesday, October 20, 2020

String Tulips 2 Quilt Positively Finished

A president doesn't have to be brilliant. 
He doesn't have to be clever. You can hire clever. 
But you can't buy courage and decency, and you can't rent a strong moral sense. 
A president must bring those things with him.
~Peggy Noonan

Quilting


My second String Tulips has more yellows in the border. {I learned that from the Electric Socket.} 

Four string tulips form an X in the center surrounded by a border of X string blocks in multicolors.
String Tulips on Blue baby quilt 

That let me choose tulip petals that are lighter in value than the first. More yellows here, too. I can see more yellow will be useful in future quilts as well. It certainly adds light and excitement. 

Black and white print for the tulip stems with purple circles near the center and yellow circles atop each tulip
Detail of crossed tulips


After all the difficulties quilting the previous String Tulips this one is quilted in the same manner. I'd like to get those ideas down pat.

A three petal string pieced tulip on blue and white stripe background
Detail of string tulips

I really, really, really wanted to use this blue and  white stripe for the background but it was a bit short in one direction. Even after cutting the extra from the height to add to the width, there wasn't quite enough to fill the space. So I just turned the final scrap ninety degrees. It adds to the charm. Right?

A lively mix of fabric strings sewn diagonally across each block form Xs around the border
Detail of String Tulips border

The back uses a blue stripe enlarged by an insert of green. 

A blue stripe fabric with a single insert strip of light green creates a back for the quilt
Back of String Tulips on Blue quilt

As always quilting visibility improves on the back. Is it because we have fewer different fabrics? The zigzagging of the border quilting is easily seen here. I stitched diagonally across each block around the inner round of the border then moved to the outer round to complete the design. The zigzags roughly parallel the strings.  

The FMQ quilting designs show on the back of the quilt
Detail of back of
String Tulips on Blue quilt

The border is the final remnant of a pillowcase made for a grandchild. Not even enough to capture the entire height of the swans but the color was a good value and I love the scale variation it adds. 

Part of the front, back, and binding can be seen in this photo
Folded String Tulips on Blue quilt

The binding caused me to pull out all my fabric {which is greatly reduced from the beginning of the year. Hooray.} This fun print was in the purples but the blue undertones {is it periwinkle?} and the sprinkling of dark blue ovals made it work very well here. I love finding unexpected solutions, don't you?

Quilt Specifics
Size: 47" x 47"
Design: String tulips and string block border
Batting: Mountain Mist Cream Rose cotton
Thread: Gutermann 50/3 light and dark blue cotton thread
Quilting: SID and FMQ
Approximate yardage: 6.5 yds

Previous posts:
1. Stringing along - the original plan

Reading

A friend recommended Reading with Patrick {The Atlantic's comprehensive review} to me and I'm glad I took her suggestion. The memoir by Michelle Kuo focuses on a two-year stint with Teach for America in Arkansas and her seven-month return to the Delta a few years later when she discovers one of her students has been arrested for murder. Michelle, who currently works for an Oakland CA non-profit, says her writing is an act of contrition. The New York Times published a conversation with her that illuminates her motives and hopes for the book. 

Enjoy the day, Ann

Tuesday, October 6, 2020

A Second String Tulip Started

It takes courage to live through suffering and it takes honesty to observe it.
~ C. S. Lewis

Quilting


The first set of Electric Socket blocks have been on the design wall long enough. After so many supportive comments, I've come to like the craziness, too, but still wanted to play with tulips. Fortunately there are still more blocks waiting to be sewn. Now I'm basically repeating the previous tulip quilt but with a brighter border. The blocks were arranged to flow from yellow to red to blue to green to orange and back to yellow around the border. The yellows in Electric Socket made that quilt shine so they had to be included in this one. Additionally, repeating the Tulip design should help crystallize all the techniques I learned {hopefully without all the mistakes.}


Because the border contains clear, bright strings, the tulips should, too. Compare them with the black tulips in the first String Tulip quilt. 

Green could have been used for the stems but this black and white seemed more fun and made a more emphatic contrast on the blue striped background. Altogether this is a jauntier look for the same layout. Funny what a difference a few strings make.

Reading

So many books are in my queue these days. I'm coming to realize how my "home reading", i.e., those books I've purchased, gets behind. The library has been notifying me daily of yet another hold that's available. After waiting so many months for access, I'm more aware of the queue of readers still waiting. 

The Smallest Lights in the Universe, a memoir by MIT astrophysicist, Sara Seager, recounts her professional development from a young girl awestruck by the sight of a clear night sky to a MacArthur grant recipient and lead of a NASA research team. Soon after becoming tenured at MIT her husband dies of cancer. The story intertwines the search for extraterrestrial life with the equally important ones of search for a meaningful life and search for connections with other lives. She masterfully links images and scenes from one to the other. 

One of her many skills is the ability to explain her projects clearly to amateurs and non-technical readers. She simplifies without speaking down. She also conveys an amazing awareness of other people, why and how she built a family/community of people vital to her life. Definitely a worthwhile read.

Enjoy the day, Ann

Tuesday, September 22, 2020

String Tulip Quilt Finished

Prejudices are rarely overcome by logic. 
Not being founded in reason, they cannot be destroyed by logic.
~Tryon Edwards

Quilting


It was worth all the time it took to remove the border quilting. The spiral design didn't add anything to the quilt because it was hidden among the strong Xs and the tension was a mess. With the machine cleaned, the needle changed, and thread rethreaded it's sewing perfectly {except for my own bobbles.} 

Four crossed tulips center the medallion with string blocks forming Xs as a border
String Tulips on Green baby quilt

Quilting began with a few free-motion arcs on the tulips then SID around the inside and outside borders. After that it was time to stipple the green center. Other designs were considered {for a couple of milliseconds} but there are already lots of strong lines in the piecing and I find stippling easy and effective. 

Quilting on the tulip and stippling on the green background
Detail of string tulip quilting

The third step was quilting the string border and this is where issues arose. The strings are so strong that no quilting shows. I thought FMQ spirals might work but had tension issues that took most of last week to resolve. After taking that out I decided to scribble back and forth in the basic direction of the strings. When I reached the opposite block corner I simply switched directions onto the next block. I went around the inner row of string blocks first then made a second pass of the outer row. Better views are visible on the back. {Photos below.} 

The photo highlights the quilting on the colorful Xs of the border.
Detail of string X border

Usually I finish each quilt before signing it but a new idea occurred recently. If I carefully place my signature I can sign before quilting. It looks neater. I don't usually add a label. My dear mother used to write them because her handwriting was so lovely but I've found the ink fades over time as the quilts are washed. Painters sign in the lower right corner on the front of their work so why shouldn't we? 

Cursive thread writing using narrow zigzag and free motion stitching in the lower right corner of the quilt
Quilt signed and dated with cursive thread writing 

Obviously chartreuse is a favorite color of mine. I thought the green print on front had yellow crosses on it and couldn't find any fabric in my stash that matched/blended until I pulled these odd colors. There wasn't enough of the first so the second was added to finish the back. Of course, I could have looked at the selvedge but that would be too easy. ;-)

Two chartreuse prints make the back of this quilt
String Tulips on Green quilt back


{Over}thinking tripped me up again. In my mind there was enough of the darker chartreuse on the back to create the binding. Where did I get that crazy idea. Only a six-inch strip was left. Back to the stash. Several yellow-green prints came to light and this one worked best. Who'd have thought? 

This is why I prefer pulling fabric and setting them next to each other. There are wonderful surprises. Color theory is great in practice but we don't deal with color like painters. Unless we dye our own, we can't blend it. We use fabric; and printed fabrics in particular have their own ways of working. 

This photo gives details of the front, back and binding of the quilt
String Tulips on Green quilt folded

The outer border of the quilt is finished with half feathers. So easy and quick... which was appreciated even more after the inner border debacle.

Quilt Specifics
Size: 47" x 47"
Design: String tulips and string block border
Batting: Mountain Mist Cream Rose cotton
Thread: Superior Masterpiece 50/3 green cotton thread
Quilting: SID and FMQ
Approximate yardage: 6.5 yds

Previous posts:
1. Stringing along - the original idea
2. String Tulips - adjusting the original idea with applique
3. Working on the String Tulip quilt - starting quilting
4. Two Steps Forward and Three Steps Back - messing up the quilting

Reading

Did you read The Witch of Blackbird Pond by Elizabeth George Speare as a child? It was recently available as an ebook and I took the time to reread it. On the death of her grandfather in the late 1600's, Kit sails from Barbados to Connecticut to live with her aunt and Puritan uncle. Her more relaxed background brings her into conflict with the rigid religion practiced in New England and it grows as she befriends a local Quaker shunned by most of the community. 

The book is praised for its theme of tolerance; however, given recent events it obviously ignores the issue of slavery. One sailor is proud his ship doesn't carry slave cargo. Kit sold {"let go" but didn't free so what else could it be?} her personal Black maid (slave.) Reading it this time made me wonder how Black children felt when it was assigned in grammar school. Fifth Chinese Daughter has worn better through the years. Still, this is a good story and a continuum on the road to the development of inclusion and tolerance... and I don't just mean the Puritans.

Enjoy the day, Ann

Tuesday, September 15, 2020

Two Steps Forward and Three Back


Time is the coin of your life. It is the only coin you have and only you can determine how it will be spent. Be careful lest you let other people spend it for you.
~Carl Sandberg


Quilting

All the border seemed to need was some quick FMQ but a huge problem arose. The bobbin thread pulled too tightly and then too loosely. It has taken the rest of the week to unsew this mess. 
 
Ripping out poor quilting stitches

Next week I'll try something else... right after I give the machine a thorough cleaning. 

But the stack of projects never ends and fortunately I have a second machine. This funny Outer Space Santa fabric has been in the pile for a year waiting to be made into an Aloha shirt for DH. He likes this style {although he's not as fond of Christmas prints as I am} because I see a family resemblance between him and the man in the red suit. It turned out well and is earmarked for his birthday. Woo hoo. One present down. Don't tell him.

Aloha shirts
Wouldn't you think I could relax and read down some of my book pile now? No. I decided to continue drawing down the enormous pile of "clothing fabric" and make a more sophisticated shirt for me. I should have left well enough alone. 

Reminder to self: patterns with photos on the front are always more accurate than those with fashion sketches. Funny. This looks just like an Aloha shirt. And about as much fit even though the sketch had lovely lines. 

The leftovers from each of the shirts now reside in the scrap bag. And I may have an idea for them.

We are working very hard to donate or recycle all our discards. An article last week suggested that all companies should be responsible for the entire life cycle of their products, including final disposal/reclamation. That would be much better for our planet than creating the acres of trash and ecological disasters we currently have. Like a VAT for end use, too. What do you think?

Like many of you, I watched Sujata and Freddy on The Quilt Show last week. What treasures they both are. Their books remain some of my favorite quilt references and I signed up for a workshop with Sujata late this year. Her suggestion of placemats resonated. I need some and they are just the right size. Can't wait for class.

Voting

Only 49 days till our election. The door for registering to vote is closing. Ask everyone if they are registered, please. And encourage them to vote. Our democracy and our lives depend on it.

Enjoy the day, Ann