Showing posts with label tutorial. Show all posts

Tuesday, April 14, 2015

Philadelphia Block Tutorial

Several people emailed me for the pattern for Philadelphia.

Philadelphia block

Here's a sketch of the block. It's a nine-patch on a six by six grid which simply means the block evenly divides into three segments on each side and those segments might be divided in half (into units.)

Sketch of Philadelphia block

Just like a block, a "unit" can be any measurement. You may choose the length of a single unit or decide the finished block size first and subdivide. My blocks finished 9". That means the major segments are 3" each (9"/3) and the subdivided units are 1.5" (3"/2).

Here are the parts I cut (with seam allowances included.)

Unit A (center):           1 muslin square 3.5" by 3.5"
Unit B (small squares): 8 muslin squares 2" by 2"
Unit C (inner):             4 print rectangles 3.5" by 2"
Unit D (outer):             4 print rectangles 6.5" by 2"

I sew most traditional blocks with this method because it helps keep the parts in order.

Cut pieces of Philadelphia
block laid out

Take A and sew two C to opposite sides. On the remaining Cs and sew two B to opposite sides. Press seams towards prints.

Center strips of Philadelphia
block sewed together

Butt seams and sew these three sections together with A in the middle.

Center portion of Philadelphia
block sewed together.

Sew two D to opposite sides of the pieced center. Sew remaining B to opposite sides of the final two D. Press seams towards prints.

These three sections of the
Philadelphia block will be sewed
together as the final step.

Butt seams and sew these sections together with A again in the middle.

The block should measure 9.5" unfinished.

By happenstance one stripe in the border was three-inches wide. I cut the sashing 3.5" by 9.5" and cut the posts 3.5" square (the same size as the center muslin.) But any width sashing would work.

Enjoy the day, Ann

Sunday, January 4, 2015

How I Finally Sewed the Curves: A Third Method

Here's a closeup of some of the curves in my curve pieced quilt. Everything looked straightforward but there were a few issues.

Whenever I took pairs of curves off the wall to sew them together, the darn things grew! They never fit back in the right place. There was always a gap to the left, the right or between the sewn section and what remained on the wall! Finally I pinned all the curves to each other.

But when I removed the top from the wall, showers of pins scattered across the floor. I must have picked up a thousand pins.

Curves overlapping each other,
before trimming and turning the seam allowance

So I put it back on the wall. See how the curved edges are slightly uneven in the photo above? As I turned the seam allowance under, almost every short wedge left a gap in the top. I hadn't overlapped the curves enough and the uneven raw edges hid that fact. Trim both inside and outside curves evenly first!

With a clean raw edge, turning was much more successful. I pinned parallel and as close to the curve as possible before steam pressing the top.

Curves with seam allowance
turned under and pinned on the outside

Next, I grabbed part of the seam allowances on the wrong side of the top between my thumbnail and index finger. Then I removed the pin on top with my other hand and repinned it along the pressed seam line. I repeated this process until the seam was pinned along the fold line on the inside of the quilt top. See the photo below.

Curves pinned on the inside
I sewed along the fold line, removing pins as the needle reached them. It's easier to remove the pins if they point towards the needle.

Machine sewing the curves
along the pinned seam allowance

I pressed the seam again when the stitching was done and then trimmed the seam allowances to a quarter inch.

Improvisational curve quilt in shades of pink, coral, red, blue, green and white

It's neither Sherri Lynn's nor Vikki's method but it worked for me.

Enjoy the day, Ann

Thursday, July 17, 2014

Steam Punk Quilt Blocks - Fifth Set with Construction Notes

The Steam Punk blocks are almost done. Just a few more and then on to the sashing!

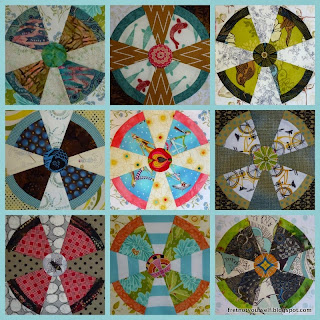
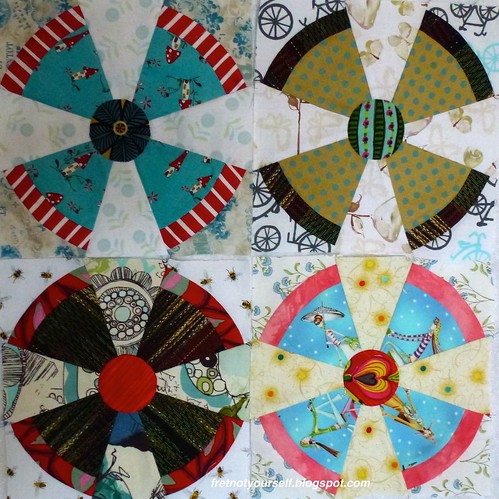
Propeller blocks in pinks, greens, blues and reds.
Steam Punk Quilt blocks 65-80

I've been taking photos of each block as they are finished and cropping the edges. That makes it very easy to create these collages in Picasa. Each collage inspires a slightly different set of blocks: lighter, darker, brighter, quieter. Previously I simply took photos of layouts on my design wall. Cropping and collaging with Picasa is a big improvement because it approximates the sewing edge. You can even add a sashing effect with any solid color by increasing the grid spacing.

Nine Propeller blocks in green, blue, brown and pink/red.
Steam Punk blocks with sashing

While we hope our blocks finish square that is not always the case. Especially curved seam blocks. After making a few I decided to alter my cutting method for the quarter circle corner pieces by cutting the outer sides of those pieces slightly larger than the template. I didn't change any other templates and still sewed quarter-inch seams.

Plastic template is positioned on fabric to show how larger outer seam allowance was cut.
Quarter Circle piece cut with larger outer seams

The extra seam allowance in the outer corners leaves enough room to square the blocks even when my sewing pulls one corner in.

Marimekko fabric in greens and blues is used with browns and yellows to create a Steam Punk block.
Top right corner of this block is not square. But larger seam allowance allows trimming.

Then I use my square ruler to trim the block to 9.5 inches with a quarter-inch seam allowance past the blade edges.

Steam Punk block ready to trim to size

I considered extending the seam allowance on the triangles also but using the correct size helped ensure the blades didn't get too big.

Here are my previous posts on this quilt:
First Set with Tutorial
Second Set
Third Set
Fourth Set

Enjoy the day, Ann

Tuesday, April 8, 2014

Pins and Needles

Look what my sister gave me last week! This is such a clever way to store bent pins and broken needles until they can be safely discarded. It's similar to the Sharps container at the doctor's office.

A small pill box is used to safely store used pins and needles
Pin Case to safely contain bent pins and broken needles

Save the pharmacy pillbox when you fill a prescription. You can use almost any small container but the translucency of the pillbox lets you see what's inside. No one needs to open the box and risk broken needles scattered everywhere.

Mark the center top of the lid and create a small hole with a drill or hammer and nail. It should be just large enough to slide your pinhead through. To paraphrase a pest control company, the sharp items "go in but don't come out." Decorate the outside of the container by gluing ribbon and buttons. At least mark the container as "Sharps" to remind the household to keep it closed.

Each time a needle breaks or the pin becomes dull or bent, slide it through the small hole. They will all stay safely in this container. Discard the entire case when it's full. Now no one will worry about being stuck by or stepping on old needles! Even when you put it in the trash, there's no worry of a random stick.

Fret not; enjoy the day.
Ann

Friday, February 28, 2014

Steam Punk Blocks

Quilting

For years I've wanted to make an airplane propeller quilt. Is it because of the curves? Or because, having sons, I am always looking for masculine patterns? Or because my grandfather loved to take us to the airport to watch planes? Not sure; but it's perennially attractive. Jeannette Bruce of Gone Aussie Quilting posted an invitation to join the Steam Punk QAL Flickr group last year. And guess what Steam Punk looks like? Yes! A propeller. So I joined and thoroughly enjoyed all the fabric combinations everyone made but... I had so many UFOs to finish first. This week I've finally started.

These nine-inch blocks resemble airplane propeller and are made with strongly patterned prints.
My first completed Steam Punk quilt blocks

The pattern by Australian Jen Kingwell came from Amitie Textiles. It arrived in the US less than a week after I placed my order. (Wow! Very quick.)

Then with unusual wisdom, I had a set of templates made by Rodney Shimogawa in Woodinville, Washington. His Etsy shop is Customplastic. What a meticulous craftsman! They are perfectly made with the template letter and a quarter-inch seam allowance etched on each thick acrylic template. And they arrived within a week, too! Honestly, I could rave for paragraphs about the templates. Why haven't I used them before? It just takes a small rotary cutter to cut around the curves.

My third super-smart idea was to order Bigger Perfect Circles by Karen Kay Buckley from Amazon. (I usually choose the hardest way. Can you tell I'm thrilled with all this uncommon brilliance?) The smallest template in this packet is the finished size of Jen's center, 2.25". So I cut the circles with the thick acrylic templates then I sewed a wide running stitch on my machine (everyone else does this by hand) and gathered them over the Perfect Circles. See this YouTube video by Karen Johnson for directions. And they are... perfect!

Here's what I learned sewing these first blocks. Curved pieces and odd angles mean the ends do not line up. If you're accustomed to squares this can throw you off. Pin liberally.

Sewing the propeller

1. Pin it! For the propeller, propeller edge and corners, fold the pieces in half and crease the center. Then mark with a pin and match the centers.

Mark the center of these pieces with a pin

2. Pin it! For each curve, pin the centers together first.

3. Then use a pin at the seam line of each edge. Notice that the fabric edges on the "straight" sides don't match up. They won't. Just make sure the corners of the seam line do.

4. Once you have a pin straight through the corners, use another pin to hold it in place.

5. Then pin halfway from each side and the center. Add more pins to help keep the back from pleating. I prefer to sew with the concave side down against the feed dogs and the convex side up. Do what works for you.

6. When both curves are sewn, gently press with a dry iron or finger press.

Pinning & sewing sequence from left to right.
Use the same process for both curves of the propeller edge.

Sewing the propeller to the background wedge.

7. The propeller and the background wedges are NOT the same angle so the ends do NOT match up. Pin it! Put a pin in at the sewing line of the propeller center and then through the sewing line of the background center. Look carefully at the arrow at the top of the photo below. There is a little "rabbit ear" where different angled pieces join.

8. Put a pin in at the sewing line of the propeller edge. It should be along the arc of the propeller edge. Then pin through the sewing line of the background edge. Look at the bottom left arrow to see very slight "dog ears"... not a long as the rabbit ear ;-). The top fabric in the example on the right is bent back a bit. Sorry.

9. Sew from center to edge to keep center from shifting.

Pin the propeller wedge to the background wedge.
Notice narrower width of the background wedge.

Sewing the propeller together.

10. Since the propeller and background wedges are different sizes, you can't butt the seams together when joining pairs.  (Yes, together they form a 90 degree angle but each one is NOT 45 degrees.) Pin the center seam line of one to the same point on another. Then pin the outside edge at the seamline. Notice they don't quite match up.

11. Add more pins to the side and sew from center to side.

12. Repeat for the other half of the block.

13. Finger press the seams in one direction.

14. Pin the centers at the point where the wedges meet. Then pin the edges. Sew from side to side.

Top left: Wedges are not the same angle.
Bottom left: Pin by matching seam line intersection points.
Right: Sew halves together, carefully matching center.

15. Unsew the middle inside the seam line and finger press in the same direction as the seams.

16. Press gently.
Unsew the center and spin it.
Press seams in one direction.

I hope this helps as you make these delightful blocks.

Edit: Here are two later posts. First a revised construction idea and next the finished quilt.

1. Having trouble sewing the block to size? Try this.
2. Finished Propellers and Planes quilt.

Enjoy the day!
Ann

Wednesday, January 1, 2014

Block Piecing Tutorial: A Method to Maintain Order

I enjoy making scrap quilts. The seemingly random arrangement of fabrics interests me and I love the depth achieved by using fabrics that don't quite match. We are so much smaller than a quilt (no matter how large we think we are.) Mismatching colors in clothing looks weird most of the time but adds so much dimension to a quilt. When I work on blocks like the variable stars I take time to arrange the lights or darks in ways that add sparkle.

Sometimes, however, I lay out a scrap block in a particular order only to sew the wrong sections together. It's so annoying. Here's a way to avoid this problem.

1. Lay out the block as you'd like it.

Nine 2.5-inch square patches of red and cream are laid out to form a star
The nine patches of this variable star block are laid out as I intend to sew them.

2: Chain piece pairs of squares from the columns starting at the top left. Place the top left and middle left pieces right sides together and sew. Repeat with top middle and middle pieces, chain piecing them to the previous pair. Repeat again with the top right and middle right. Do NOT cut between these three chained pieces but cut after the third (right-most) one is sewn. (This is where I'd sew an ender to keep the thread from tangling.)

Three pairs of red and cream squares are sewn together on a Bernina sewing machine with thread linking the pairs into a chain.
Chain piecing the two squares from each row.

3. Finger press seams to opposite sides and open.

Layout of red and cream nine-patch block showing three pairs of squares sewn with chain piecing intact between them.
The first two squares in the first two rows are sewed
and the thread is still chained between them.

4. Now chain piece the next square in each column to the previous sewing. Place bottom right piece to the right section, right sides together and sew. Repeat with bottom middle piece and middle section, chain piecing them to the previous set. Repeat again with lower left piece and left section. Again, do NOT cut between the chained pieces but do cut after the third one is sewn. (Sew another ender.)

Red and cream squares of a nine-patch are chain pieced into three columns to maintain the order of the pieces.
Chain piecing the bottom squares
to each column.
Ender #1 is in the background.
 
5. Finger press seams to opposite sides and lay open. The block is linked by the sewing thread you didn't cut. Everything should be in order.

Three column of a block are chain pieced together to maintain the order of the squares.
Two sets of chain piecing completed.
(Sorry, the columns look like rows
so you can see the chaining.)

6. Place left and middle columns right sides together butting seams and sew. Sew an ender. Cut.

Two columns of three red and cream squares each are sewn together to in the penultimate step of making a Variable Star quilt block.
Sewing two columns together.
Notice how chains hold the
third column in place on the left.

7. Repeat with last column. Sew a fourth ender. Press and admire.

The final column, chain pieced to the main section, is ready to be sewn to the nine-patch block.
Two columns sewed.
Ready to sew the last column.

The block is now sewn in order. Yea!

A variety of red fabrics create a star on the cream and white background of a Variable Star block.

This method works for any block that breaks down into squares such as four-, five-, seven-, nine-patches. And did you notice I sewed four enders making this one block? That's how I get so, so many scrap blocks finished {which is both a blessing and a curse.} Do you have questions? Let me know.

Wishing everyone peace and joy throughout the New Year.

Enjoy the day. Ann

Monday, October 28, 2013

Trips Around the Block Tutorial

They are made with the same simple block using similar black & white fabrics. Streak of Lightning is so bright and cheerful but I also like the shadings of grey in the next. It was set with dark grey crosses centered on a multi-colored friendship star then sashed with very light greys.There's finally time to work on this quilt again after a long hiatus for baby gifts and traveling. I'm still working on the border but here's a tutorial for Trips Around the Block, a two-block quilt of X- and O- layouts.

Trip Around the World variation called Trip Around the Block made from scraps
Trip Around the Block without border
My basic plan for this quilt:
  1. Make the main diagonal grid medium to dark blues and greens. (1-4 on the value finder.)
  2. Group two or more rows of darks or lights together frequently.
  3. Use lots of spring and summer colors and white, some black, very little brown. 
Use or change at will; I did.

Fabric Requirements:
My squares finished 1.5". Each 10.5"-block is a seven-patch with 49 squares. I chose an odd number of columns and rows with an X-block in the corners. A 5-by-7-block quilt finishes 52.5" by 73.5" without borders and takes 1715 squares, about 4.875 yards of fabric.

Cutting:
Cut strips 2" wide and subcut into 2" squares.

If you prefer 2" finished squares use five-patch blocks instead. In this case, each 10"-block contains 25 squares. A 5-by-7-block quilt finishes 50" by 70" and takes 875 squares - about 3.875 yards of fabric. Cut strips 2.5" wide and subcut into 2.5" squares. 

Pressing:
Consistent pressing enables seams to butt together perfectly. For O-blocks finger-press odd rows up and even rows down. For X-blocks finger-press the odd rows down and evens rows up. Press the columns of the O's to the right and those of the X's to the left.

Sewing:
After laying out the O- or X-block, sew squares into columns and then sew columns together to complete the block.
The first block, a Mini-Trip Around the World, is laid out with fabrics encircling the center square.
The two left columns are sewn.
After all squares are sewn into columns, sew columns together.

Make seventeen O-blocks first. Any combination works. Vary the darkest round of each block. You can use different fabrics in the same round. Here are some examples I posted previously or go to this post for more examples. 

Three examples of Mini-Trip Around the World showing a different fabric placements for the O-block
The middle block has four dark corners.
The darkest fabrics of the right-hand block
are round 6 (counting from the center.)

When completed, lay out an alternate set.

O-blocks laid out in an alternate set.
The second block in row three has different fabrics in round six.

Now it's time to make eighteen X-blocks. Start with the main X of 13 squares to divide your block into four quadrants. Think of opposite v's as a round and again make them any way you like. The fabrics in a "round" can be the same or different.

Starting the X-blocks.
The blue round in the bottom O-block is made of two fabrics.

Originally it seemed important to have a darker and lighter side of the X. However, the X itself is very strong and the O's establish the diamond shape. So whatever you put in the V area should work.

I had more trouble sewing the X-blocks correctly; I kept trying to sew them into O's. It helped to keep them laid out as I sewed. This post has more examples of X-blocks.

X-blocks laid out but unsewn.
They look much larger than the O-blocks
because the squares are not sewn.

I'd love to see what you create!

Enjoy the day. Ann

Wednesday, September 18, 2013

Four Patch Log Cabin Tutorial and Settings

Some people asked the directions for Four-Patch Log Cabin. It's an easy six-inch finished block using six fabrics. Here's a cutting chart.

Fabric Color       Number of Pieces       Cut Size
Bright A                       2                      2" by 2"
Bright B                       2                      2" by 2"
Black A                        1                      2" by 3.5"
Black B                        1                      2" by 5"
White A                       1                      2" by 5"
White B                       1                      2" by 6.5"

Four bright squares are surrounded by two black fabrics and two white fabrics to create this block.
Pieces for Four-Patch Log Cabin block
Using quarter-inch seams sew the four-patch together, pressing seams to one side and butting them together to finish the four-patch. Next sew Black A rectangle to the four-patch, pressing to the outside.

The four bright squares are sewn first;  then the first black rectangle is attached to begin the log cabin.
Partially sewn Four-Patch Log Cabin
Add Black B rectangle and again press to the outside. Double check that you are adding rectangles in the same direction on each block. Mine are clockwise. It doesn't matter whether they turn clockwise or counterclockwise as long as all blocks are consistent. Finally, add White A and finally White B, pressing to the outside.

What about the setting? Regular Log Cabins on point make a Straight Furrows set.

Log Cabins of light and dark scraps are laid out to demonstrate a straight furrow set.
Straight Furrows layout, log cabin blocks
When Four-Patch Log Cabin blocks are laid out the same way, they appear more like Streak of Lightning. Log Cabin blocks look like dark and light triangles. This block looks like a dark/bright square with a white L. That makes the difference in the layout.

These four-patch log cabins are set on point with red triangles surrounding them and a black and white striped border.
Four-Patch Log Cabin. Layout is Straight Furrow but looks like Streak of Lightning.
Here's one variation of regular Log Cabin Streak of Lightning layout.

Log Cabins of light and dark scraps are laid out to demonstrate a streak of lightning set.
Streak of Lightning set, log cabin blocks
The fabrics in FPLC are so strongly patterned that simple quilting seemed best. The black and white logs are simple straight line and ditch quilting; the bright squares are free-motion orange peel. I thought about heavier quilting but decided they should match the logs in density. There are lovely feathers in the bright red that don't show up. Finally, the border just needed simple echo quilting to highlight the prints. Sometimes less is more. But looking at the regular log cabins inspires me to use some of the designs Leah is using in her locks of hair. I'll have to sew these tops now.

Enjoy the day! Ann

Saturday, June 29, 2013

Scrappy Trip with Borders and a Mini-Tutorial

Here's the finished top. The narrow diamond border incorporates similar colors with a different shape for added interest. And these were not that hard.

Scrappy Trip quilt made of mainly greens and pinks.


Revised 8/11/13
The original instructions seemed unclear to new quilters so here's a revision. I started with a square quilt made of nine blocks set three-by-three. The length and width are the same.
A bit of math background:
  • A diamond is a rhombus. (A square is also a rhombus.) 
  • Their sides are all the same length and their opposite angles are congruent – the same measure. 
  • All the angles of squares are 90° but diamonds are usually other measures, like 60° and 120°, 45° and 135°, or 30° and 150°.
  • Directions saying ‘cut a two-inch diamond’ refer to the length of one side of the diamond not the length along either diagonal. 
  • Looking at traditional blocks, the diamond is usually set against a square or right triangle; that’s why this measurement works.
My strips are already 2” wide so my diamonds will finish 1.5”.

Constructing the border:

    • Lay out three strips white/green/white angling the beginning as shown to utilize the most fabric. (A below.)
    • Sew strips with quarter inch seams.
    • Measure a 45° angle by aligning the ruler’s 45°line with the seam line of the strips. Cut the angle. (B below.)
    • Measure two inches from the angled edge and cut one set of diamonds. Repeat until you have enough sets. Make straightening cuts when needed to keep a true 45° angle. (C below.)


    1. Sew the diamond sets together as shown (quarter inch seams) until they are slightly wider than the finished width of the current top. (My top was 36" after subtracting the outer seam allowances.)
    2. Add an extra white diamond to each end of the border.
    Diamonds set out tip to tip with one extra white diamond added to each end of the strip.
    1. Press the sewn strip gently to open the seams. Don't rub or use steam; just press up and down.
    2. The edges are uneven so measure a quarter-inch from the wider-angled diamond points and trim.
    3. Also trim the short ends of the strips a quarter-inch from the diamond tip.
    Line up ruler edge one-quarter-inch past the diamond points and trim the borders.

    Border strip with one side trimmed.
    1. Measure the length of your strip from the endpoint of the left-most colored diamond to the endpoint of the right-most colored diamond. 
    2. Trim excess. The border on my quilt was 37.5"; the red diamond sample here measures 12.125“ long. 
    All sides trimmed with quarter-inch seams past the diamond points. Measure the length and width of the border from point to point.
    1. Subtract the finished width of the current top and divide by two. This is the finished width of the inner border. In my case: (37.5 – 36) / 2 = 0.75”.
    2. Add seam allowances and cut strips for the inner border to that width. No matter the length of the diamond border, it will always fit because the width of the inner border is chosen last. In my case: 0.75 + (2 * 0.25) = 1.25" wide.
    3. Sew and press the inner borders to the quilt.
    4. Carefully pin two opposite sides of the diamond border easing in fullness as needed.
    5. To make the corner blocks (squares-on-point):
    • Measure the finished width of the diamond border from one wide-angle point to the other. It is always an odd measurement. Mine is about 1-11/16” finished. 
    • Draw this size square on a piece of graph paper.
    • Find the midpoints of each side and draw a square on point.
    • Check that the size is correct.
    • Paper piece.
    1. Sew corner blocks to the final two diamond border strips.
    2. Attach the final two diamond borders to the quilt, matching the intersection of the borders and easing fullness as needed.
    3. To keep the quilt square, measure the length of current top across the middle and make the first two sides of outer borders these lengths. 
    4. The last two sides of the outer border are this length plus twice the width of the outer border.
    I hope this helps. Fret not; enjoy the day.

    Ann