Showing posts with label quilting design. Show all posts

Tuesday, January 23, 2018

Finally Quilting Chinese Coins II: AHIQ 29


AHIQ Invitation
Kaja and I discussed last year's AHIQ invitations and think they went pretty well. Our goal was and remains to build an interested community of quilters exploring original ideas for everyday quilts. The open-ended topics let each of us develop our own interests at a variety of skill levels. We all  expanded our understanding of improvisational utility quilting and became more confident in our skills.

I noticed that I needed more than a couple of months to work on each idea, especially since I wanted to incorporate the technique into ongoing work. Meaty projects that challenge me on several levels are much more engaging {although I'm in the throes of a group of fairly quick small quilts right now.} However, by the end of the year everyone's energy dropped off. I know my time was overcommitted. There were several projects that simply had to be finished; something had to give.

This year we plan to present only two invitations/challenges. We hope this will fit into your schedule more easily, encourage more participation and longer discussions. Kaja's leading off with a new idea this month. Check her post for all the details. I can't wait to start.


Queued Up
I finished several quilts recently because they were small but I'm still working on two that are pin basted.

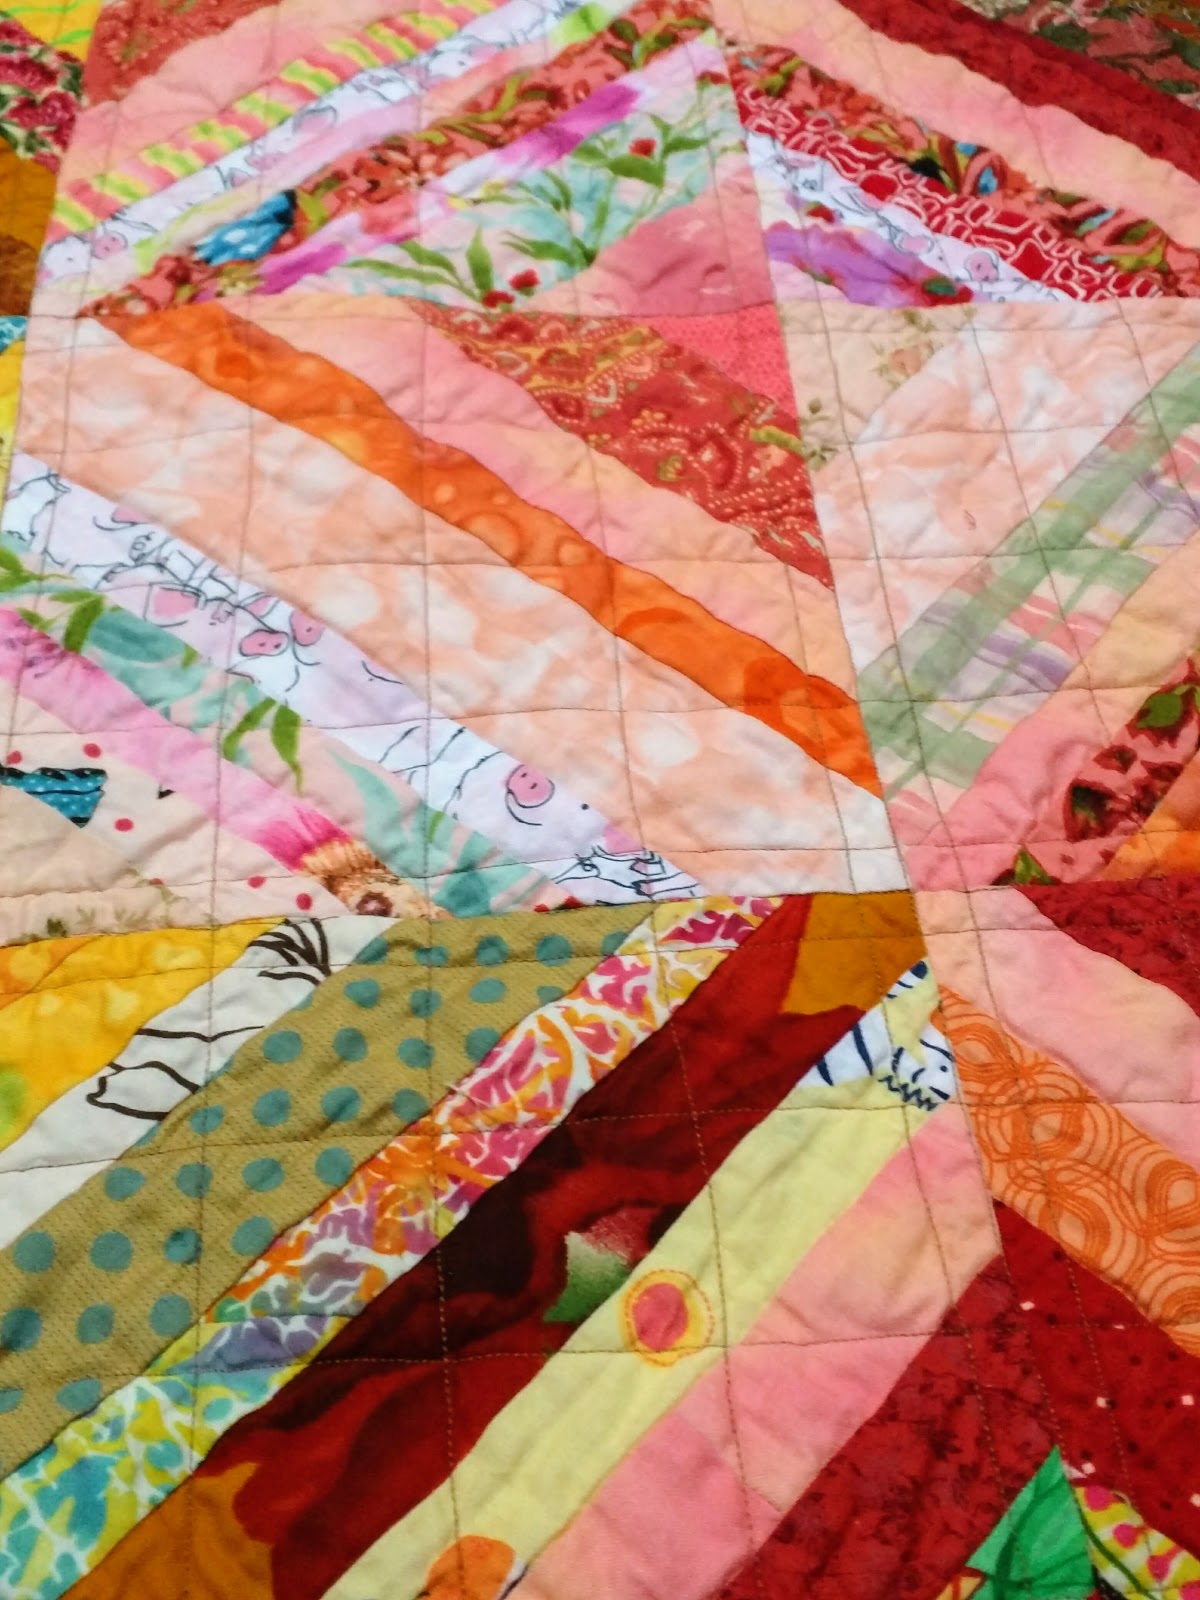
Chinese Coins II quilt (CCII) with SID complete

Southern Hairstyles and Quilting
My mother loved to read columnist Marilyn Schwartz in the Dallas Morning News. The way Marilyn poked fun at Texas pretensions always made her laugh. When A Southern Belle Primer: Or Why Princess Margaret Will Never Be a Kappa Kappa Gamma appeared in 1991 my mother was among the first to purchase it.

One chapter dealt with hair. Given a choice, Texas women want fine rather than coarse hair because it sounds classier. Curly or straight? Curly, of course; waves are so beautiful. And thick or thin? Why thick. As Marilyn noted, we just selected the worst possible combination: curly, fine and thick - a mess to style, ready to frizz with the slightest humidity.

What does this have to do with quilting? Well, that's the same way I quilt. Simple or complex pattern? Complex. Print or solid fabric? Prints, of course. Simple or detailed quilting? Oh, detailed, please. And we all know the result. Tiny pieces rarely show prints to advantage (and vice versa.) In fact, echo or parallel quilting is all that really shows on my quilts because those beloved prints hide all the fancy stitching.

So why do I spend so much time agonizing over quilting designs? IDK. Crazy. The longer I dither, the less capable I am of moving forward. CCII is a case in point. Realistically I should quilt an all-over pattern with grey thread and move on. Not much is going to show on this large quilt with loads of patterned fabrics. But I can't bring myself to do that.


Quilting Smaller Shapes on CCII
New Year's prodded me to get busy. The choice was to quilt it or watch is rot in storage. Requisite SID started the quilting. Then FMQ in dark threads since I had {sort of} decided on how to attack the darkest fabrics. The spiral-and-wiggle isn't that great. What was I thinking?  And everything always looks bad at this stage - especially when dark thread traipses across white backgrounds. I keep reminding myself it will look better when the rest is done. I didn't want to worry about threads peeking through. Now I only need to finalize the rest of the designs.

Free motion quilting on Chinese Coins II quilt back

Next up was the star posts combining a spiral with FMQ outline of the points.

Bottom left: Free-hand-and drawn circle with washable marker.
Bottom right: Hold the tails, stitch the circle then start to spiral out. It's slow moving the tails from hand to hand as I circle around.
Top right: Continue spiralling until I hit the base of one of the star points.
Top left: Outline the star points with FMQ. Finish back at the spiral to tie off.

Quilting a star with spiral center

In case you're still wondering: Princess Margaret would not be pledged because she smoked in public.

Enjoy the day, Ann

InLinkz removed because it was hacked.

Saturday, March 11, 2017

Quilting Stars

I switched to a simple spiderweb design for the full webs although it may need some cross lines. This design is working better than the petals although the half-petals around the border are okay. I plan to keep them since that would be a major unsewing job.

Free motion spirals in stars.
Webs and flowers in spiderwebs

On the other hand, the spirals in the stars are lovely. These smaller units are easier to handle on a domestic machine. {I don't know why I forgot how difficult it is to create smooth arcs longer than the space under the machine.}

Then I'll head to the border. Several ideas are floating around my brain and surely one will work well. This needs to be finished soon. It's supposed to hang in our guild show April 1 and 2. If you're in the Bay Area, please come. Lots of talent in this guild.

Enjoy the day, Ann

Tuesday, March 7, 2017

Quilting the Spiderwebs and Random Coins

The plan was to use the same design to quilt my spiderwebs as I'd used on Suhavi's toddler quilt. But this quilt is more than four times larger. Even though I marked the inflection points with washable marker rather than straight pins, my struggles with the weight and bulk certainly show in the wobbliness of the curves.

Spiderweb with petal quilting

Only a few webs are quilted and they are all near the center. It seemed better to start there since the rest of the quilt is softer and squishier. But I'm not "warmed up" enough and it shows.

I've set it aside for a few days while I decide whether to redo the worst areas or take it all out. Here's a possible spiderweb design that might work better.

Possible spiderweb design

Meanwhile, I started another Chinese Coins. Currently I'm using the scrap bag. That thing is packed to overflowing.

Sewing small Chinese Coin sets

Wanting to try the boxing effect, I framed sets of one to four coins with red.

Boxing Chinese Coins in red

There's too much red. Back to the drawing board.

I next sorted by colors and have been making trios of mostly blues and greens {after a short foray into pinks.} They are arranged vertically so I force myself to try a new direction.

Chinese Coin sets arranged vertically

Finally something is working although I'm not sure where it's going.

Enjoy the day, Ann

Thursday, March 2, 2017

Chinese Coins in the Bank and KofB #14

A bit of bad timing. Kaleidoscope of Butterflies sneaked up while I was focused on Chinese Coins so not much to show. Still no butterflies in my area although the milkweed is growing well.

Last August, the Chicago Tribune noted the drastic decline of monarch butterflies in 2016. Their migration starts this month. Please add milkweed and nectar plants to your garden. Chris Clarke of KCET wrote an article about the benefits of gardening with native plants.

Cathy posted a fun and easy looking butterfly block on her blog. I think I'll have to try it. I want to make a butterfly quilt this year.  

#AHIQChineseCoins

Yep, the Coins have been deposited at my niece's house. Here's the finished Chinese Coins after a quick wash and dry.

Each column consists of alternating pairs of fabrics: blue, yellow, grey or white
Improvisational Chinese Coins quilt

Since Spiderweb is mainly free-motion quilting, I decided on a simpler walking-foot design for this time: parallel lines. I started them across the quilt about 1 to 1.5-inches apart.

Beginning parallel quilting lines about 1-1.5" apart

Then I returned and added a quilting line between every other set. This maintained the look of the parallel lines, increased the quilting density (which might help reduce the strain on those long seam lines, and added a bit of textural variety.

Spiderweb quilting has been a bugaboo but this was quick and easy. It only took two days to quilt. I need to quilt like this more often.

Filling in with an additional line between every other pair

The middle column contains only three fabrics: blue, yellow and a floral Marimekko. I was able to include the informational text on one of the coins because it was printed far enough away from the selvedge.

Selvedge text included in quilt
Detail of Marimekko informational text

A bright blue binding added more color. I think it needed the pop.

Chinese Coins binding and quilting details

Now this quilt graces its new home in Pflugerville. Don't know where that is? Many songs are written about beautiful cities around the world but Pflugerville is a small, farming community north of Austin. Here's video of one by the Austin Lounge Lizards.

Here are stats about Pflugerville's Chinese Coins.

Quilt Details
Size: 57" x 75"
Design: Improvisational Chinese Coins
Batting: Mountain Mist Cream Rose 100%cotton
Thread: Gutermann cotton, light blue
Quilting: Parallel lines with walking foot on domestic machine


Other sights in the area include Cele's BBQ restaurant (pronounced Seal.) It's been used as a location of several movies including Second Hand Lions {which I've seen} and Texas Chainsaw Massacre {which I have no plans to see.} Great barbeque beef, ribs and sausage but you have to bring your own sides. Really.

Cele Community Center and BBQ restaurant

Another day we drove over to The Oasis on Lake Travis where you can see some of the most gorgeous sunsets in the world. I haven't eaten there in years - before it burned. Still gorgeous views although we were there at midday rather than sunset.

View of Lake Travis from The Oasis

There's more art than I remember, including this piece.

Spaceship Oasis art installation at The Oasis

Artwork abounds throughout the region. This mural decorates the wall of Google Fiber Austin.

Mural at Google Fiber Austin

There's still time to link up with AHIQ, too. Share your progress with Chinese Coins or another improvisational or utility quilting here.

Enjoy the day, Ann

InLinkz removed because it was hacked.

Saturday, February 18, 2017

String Quilt for a New Grandmother

Ok. I got sidetracked. Instead of working on Coins or Spiderweb, I finished a top for a dear friend who recently became a grandmother. No complaints though. A finished quilt is always a win plus it only took a day to baste, quilt and bind this little toddler quilt which will be perfect to use when the baby visits.

String quilt quilted with a grid pattern using a walking foot.
Red and yellow string quilt, quilted and bound

The quilting design is a variation of the one I used on the blue string quilt. This time I stitched in the ditch of all the blocks then stitched a half-inch away on each side. Finally I divided the remaining space into half and half again (four equal-ish sections.) It was easy to quilt from point to point with the walking foot after eyeballing the spacing and marking it with straight pins. The ditch stitches only show on the back; that makes the front a bit plainer than intended.

Quilting point to point using
straight pins to mark the points.

The fabric for the back has been in my stash for years. {In fact, I just culled it. Sitting on top of the "future sleeve" pile made it more noticeable.} What a treat to have sufficient yardage for the entire back.

Red and Yellow String quilt detail:
quilting, binding, and backing

The same fabric creates the binding, too. It is cut separately, not pulled from the back. The fabric is naturally blurry and a third of a yard still remains.

The best thread color turned out to be brown. Blending with both red and yellow, it's not too harsh on either color.

Quilting detail, red and yellow string quilt

Quilt Details
Size: 40" x 48"
Design: String quilt on paper foundation
Batting: Mountain Mist Cream Rose 100% cotton
Thread: Brown Metler cotton
Quilting: Walking foot on a domestic machine

Enjoy the day, Ann

Tuesday, December 6, 2016

A Finish with an Easy Quilting Design

I finished the blue string quilt. These certainly are quick, easy quilts for toddlers. Not much to them; perfect for playtime, games, and spills.

Paper pieced string quilt in all shades of blue
Blue string toddler quilt

The binding is the light green I planned {and then discarded} for the green string quilt. It complements the bits of green in the strings.

Simple back of blue string quilt

A simple back. Of course, there wasn't enough of the larger piece but I had this eighth-yard remnant to finish it off.

Quilting and binding details
of Blue String toddler quilt

Finally, a close up of the quilting and binding. I eyeballed 1.5" spacing between narrow rows that mimic flat-fell seams on jeans. The idea came from the sashing of this old t-shirt quilt.

Quilt Details
Size: 40" x 48"
Design: String quilt on paper foundation
Batting: Mountain Mist Cream Rose 100% cotton
Thread: DMC fine embroidery blue cotton
Quilting: Walking foot on a domestic machine

Enjoy the day,
Ann

Saturday, November 19, 2016

Green String Toddler Quilt

For once, an easy finish. The stash of presewn blocks made this a quick job. I laid the blocks out and sewed them up in one afternoon. Small tops take very little quilting time. I channel quilted on the diagonal using the walking foot and casually spacing about the width of that foot. With this design, it's important to keep the quilt square with your hands or it can warp into a diamond.

Green String toddler quilt

Continuing my vow not to save fabric for a {possible but unspecified} future use, these two made a delightful back. The yellow moons with lilies have always made me smile.

Back of Green String toddler quilt

Originally I cut some light green binding but didn't like it. When I added it to the little box of leftover binding I found lots of green remnants. They work much better for me. The purple dot is the last of an apron made two years ago for my dear sister who's passed away. It's a cherished memento.

Binding and quilting detail on green string toddler quilt

Off to my darling grandson this week.

Quilt Details
Size: 40" x 48"
Batting: Mountain Mist Cream Rose 100% cotton
Thread: Gutterman green cotton
Quilting: Walking foot on a domestic machine

The next AHIQ linkup is the coming Tuesday. What utility or improvisational quilting do you have to share?

This Thanksgiving I hope we all consider how we can share our many blessings with others.

Enjoy the day,
Ann

Tuesday, November 8, 2016

Free Motion Quilting Designs

The narrow frame around the t-shirts needs quilting designs so I decided to practice a different one in each. The stitching doesn't show much from the front so these photos are from the back. I'm not sure it's any more visible.

These easier ones started it off: loops, hearts, Greek key, and leafy vine.

Designs of loops, hearts, Greek key, and leaves in free-motion quilting
First set of linear free motion quilting designs

There are also some s-curves and circles on the black fabrics. Then I was running out of ideas but remembered Lori Kennedy's blog. I chose to attempt {with varying amounts of success} mistletoe, daisies (with too many petals), basic bow, and paper clip (which looks more like a spiral.)

Second  set of linear free motion quilting designs

This was a good place to try out so many different designs. None of them really show but I entertained myself. Now to finish the wide red sashing and the outer border.

Enjoy the day, Ann

Friday, October 28, 2016

Folded Star Quilt Finished

Making a public goal got this quilt done. It's in the mail. Hooray! There was no more of any of these fabrics. A remnant of another green made the binding. In fact, there wasn't quite enough so I added a slightly different shade visible at the bottom left if you look carefully enough.

Quilt of solid colored fabric of greens, peach, red, purple, navy and grey
Folded Star quilt

Last week I showed a photo of the spirals without the echo rows. Here it is again with echo quilting which makes the spiral stand out better. {The Ad Hoc Improv Quilting link is still open on that post. Kaja and I would love for you to join our study/discovery of utility and improvisational quilts.}

Detail, Folded Star quilt

Just another detail of the quilting. I wish I'd used grey fabric where the navy triangles are.

The center was quilted with a walking foot by eyeballing the width. The navy and grey areas are FMQ. Playing with curls, hearts, bubbles and stipple. I did mark the spine of the feathers in the outer border.

Detail, Folded Star quilt

Quilt Details
Size: 40" x 40"
Pattern: Folded Star by Cristy Fincher
Batting: Mountain Mist Cream Rose 100% cotton
Thread: Various embroidery and sewing-weight cotton
Quilting: Walking foot and free motion on a domestic machine

DH took me with him to a meeting in Pennsylvania so I spent a perfect day at Valley Forge. It was so warm; several locals were on the grounds reading and sunning. They must know winter is coming.

This is the Potts' home that George Washington rented at Valley Forge. The front door is almost a dog-trot; when open, air blows straight through it and out the back door. (Texas pioneers built homes with a wide open hallway down the middle to cool their houses.)

Valley Forge headquarters of George Washington

Here are some details of the rooms.

I watched Hamilton's America on PBS this weekend and was surprised to see so many places I've visited. Several were from Valley Forge. They seemed to be standing exactly where I took my photos! The program mixed parts of the Broadway musical Hamilton with background visits to various museums and historic sites. I thought I'd be disappointed that it wasn't the entire musical but the program was excellent. Hope you saw it or have a chance to see it... and the musical!

I'm dusting off my copy of The Federalist Papers to reread. These essays written by Hamilton, Madison and John Jay urged Americans to ratify our proposed Constitution and are still used to interpret the original intent of that document.
Rooms inside Washington's Valley Forge home

Ten to twelve enlisted men lived in cabins like this that have been reconstructed throughout the Park. Love the split rail fence.

Log Cabin for enlisted men at Valley Forge

The National Memorial Arch was built in 1910 and finished during WWI. Chiseled in it is Washington's tribute to his troops: Naked and starving as they are we cannot enough admire the incomparable patience and fidelity of the soldiery.

National Memorial Arch, Valley Forge PA
Enjoy the day, Ann

Tuesday, October 25, 2016

AHIQ Linkup October 2016 and Quilting Spirals

Between this small quilt and the t-shirt quilt I haven't started any improv this month. But the quilting design has free-hand aspects. After some ditch quilting with a walking foot, I decided to quilt spirals on the inner border.

Why? Because the thread is a bit heavier and tends to knot up if you change directions in a point. Spirals have no sharp points for knots to form.

Free motion spirals without echo quilting

I used a glass to mark circles. This keep the spirals reasonable spaced. But it still takes practice to maintain spacing during the inward and outward spin.

A glass makes a good
template for spiral placement

Adding a line of echo stitching on each side of the spiral will fill out this border.

Enjoy the day, Ann

InLinkz removed because it was hacked.

Tuesday, September 20, 2016

Quilting the Spiderweb and Catalina Island

I tried some different quilting on these spiderwebs. I used the walking foot to travel from point to point around each seam creating petal shapes.

When I got back to the starting point, I marked a point 1.25 inches from the center for the next round. I used pins to locate those points since markers didn't show on all the different fabrics. {The distance was a random length that looked good to me on these spiderwebs.

Marking endpoints for
point to point quilting on a Spiderweb quilt.

For the third round, I used the same distance and marked it from the outer rim of the spiderweb.

Marking the endpoints of the third round
of quilting on the Spiderweb quilt

Using the same distance meant I didn't have to change the ruler and risk messing up the second and third rows.

Spiderwebs with three rows of quilting

I simply imagined gentle curves between consecutive points. Each round has a slightly different curve; in fact, each curve is slightly different because they aren't marked.

By planning where to start I was able to sew all these rounds from web to web without breaks. Hooray! Only two pairs of threads to bury.

We recently spent a weekend on Catalina Island. I've always wanted to see the flying fish so DH arranged an evening boat ride. That was the highlight. But Catalina has so much more, especially if you like beach life. The water is beautifully clear and there are two marked areas to swim and snorkel. Loads of sea life on view.
Views of Avalon bay on Catalina Island and Zane Grey's house

Zane Grey, a Western writer, had a home here which is now being converted to a hotel. The Casino {which they carefully explain means 'gathering place' not 'gambling'} is visible in the lower left photo above. The entrance has wonderful aquatic murals.

Murals at the entrance to the Casino, Catalina Island

The Nature Conservancy encompasses most of the island and includes the Airport in the Sky, a landing field for prop planes.
Airport in the Sky, Catalina Island

The Channel Islands have a five-pound native fox. Two of them posed for photos: one at the airport {no, I didn't feed him} and the other resting along the roadside {at the narrowest point, of course.}

Two native foxes and a buffalo
seen during a tour of Catalina Island

Additionally, the Conservancy supports a small herd of bison brought to the island for a film in the 1920's.

The critical issue on all the Channel Islands is the lack of water. The drought that encompasses most of California is particularly acute here. All restaurants are required to sell bottled water {imported from the mainland} rather than serve water in a glass. As of September, they must use disposable dishes. The toilets everywhere use salt water to flush. Very smart. But the faucets and shower heads in our hotel seemed to have no restrictors.

Only a few cars are allowed on the island; it takes about 14 years to get a permit. Most people get around via bus, bicycle, walking or one of the 1100 golf carts. The air was so clear that walking was a pleasure.

The ferry sailed past Point Fermin lighthouse on our way to the island but DH arranged a helicopter ride back as a special treat. What a great birthday.

Ferry to Catalina Island passes Point Fermin lighthouse.
Newport Beach from the helicopter.

 If you're in the Bay Area this weekend find time to visit Sherri Lynn Wood's newest exhibit, Afterlife. She's created a series of quilts using recycled materials.

Enjoy the day, Ann

Saturday, September 17, 2016

Spiderwebs and Stars

I cut kite shapes a couple of years ago for a spiderweb quilt. "More is more" {my usual method}  didn't work in this case so the warm colors were pulled and stashed away for a while.

Digging them out recently there are sixteen stars; perfect for the toddler quilt I need. Actually I needed it this summer but only have time to start it now.

Orange and Red Stars form the background
of this Spiderweb toddler quilt

Several layout tests until I decided to arrange the stars diagonally.

The outmost string on the spiderweb wedges must contrast with the star colors. Some were red, orange or yellow. I moved them to a star with a different value. And lucky me, there were some blue wedges from the previous quilt that didn't look good against blue stars. {I still need to border and quilt that one.}

Laying out the Spiderweb quilt

It's always amazing how much smaller the quilt becomes as the units are sewed.

Sewing Spiderweb quilt blocks
Coming along well.

Enjoy the day, Ann