Showing posts with label AdHocImprovQuilters. Show all posts

Thursday, June 21, 2018

Ad Hoc Improv Quilts Button Code Repaired

I think the button issues are corrected now. Try it (code on the sidebar) and let me know if it doesn't link properly for you.


Julie's already written a post about her Improvisational journey. Check that out you're there.

Enjoy the day, Ann

Tuesday, June 19, 2018

A Group Blog for Improvisational and Utility Quilting

Kaja and I started a group blog for improvisational and utility quilters. We believe it will generate more interest and encourage more participation than a linky party because every contributor will be able to write as and when they choose.

AHIQ group blog

Check out our inaugural post at AdHocImprovQuilters(dot)blogspot(dot)com. When you have something to contribute let us know and we'll gladly add you.

Kaja and I plan to post there on Fourth Tuesdays... and any other day we have something improvisational or utilitarian to share.

Patty asked how to add the button to her blog. Here are directions if you use Blogger:
  1. Go to the sidebar of Kaja's or my blog. 
  2. Highlight the code (text) under the AdHoc Improvisational Quilters button. 
  3. Press Control and C at the same time to copy it. 
  4. Go to your blog's design page and choose the settings tab. 
  5. Click Add a Gadget in the sidebar. 
  6. Choose HTML/Java script. 
  7. Press Control and V at the same time to paste the code into the second (larger) box in your gadget. Save the arrangement of your layout.

Enjoy the day, Ann

Tuesday, August 22, 2017

AHIQ 24: Pieced and Appliqued Words

Wasn't the solar eclipse exciting? I hope you had a good view of it, too. If not in person then at least on the news. NASA had an entire series of telescopes set up to view the live event as it crossed the US. Here's a feed from Madras, Oregon.

This is the second month of #AHIQwords invitation.  Part of improvisation is trying new techniques even if we must push ourselves. I may be the last quilter to add lettering to a quilt but it's something I always wanted to try. This is the time for me to check it off my list. The thing is: it's so much fun I can't wait to start another! Who'd a thought?


Baseball Quilt

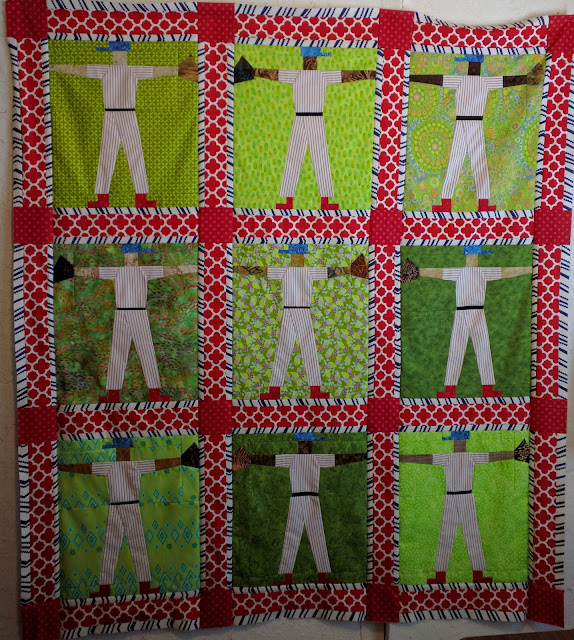
The blocks are pieced and sewn with sashing. After realizing blue would dissolve the hat and red the shoes, I chose a white-and-blue stripe combined with red-and-white make a wide sashing. The quilt is getting livelier by the day. In baseball, the team name is on the front while the player's name and number is on the back. I could put numbers on each player or simply a "P" but haven't decided yet. {In part because FO hasn't sent me a list of his favorite players.}


Baseball players in red and white pinstripe
Phillies baseball team with sashing


Words on Quilts

This is as good a place as any to add words to a quilt. My first idea was to freely piece words around the borders until I realized the Phillies name is usually red in an upright cursive.  That's a machine applique job. After many attempts, my script finally looks similar to theirs. 

I traced Phillies onto red fabric then prepped the entire 8"x 25" rectangle using Lara's method in Crafted Applique. Years ago, Cindy England told me the best way to make sure a word is straight is to cut it out after it's laid on the background. And Audrey at Quilty Folk keeps writing that she appliques before sewing the border to the quilt. Isn't it helpful to have such smarties around? It's certainly made the job easier.


After lining the word up with the edge of the border, I pinned it, pressed it, then machined sewed along the pencilled lines. Then, taking a very deep breath, I cut about an eighth-inch away to remove the extra. 


Starting to cut away the applique

Mel at Piece, Love & Happiness loves Havel snips for this. I tried hers a few times but couldn't get enough control. Fortunately, Havel has another pair that remind me of nail scissors. The curved blades made cutting around the curves a snap; I simply turned the scissors back and forth in my hand to match the seam. Thanks, Mel!


With some relaxing music while sitting at a sturdy table with good light, I finished in about an hour. 


Continuing to cut away the applique with Havel scissors

The FO's name and graduation year need a location - border or back.

They won the World Series in 1980 and 2008. Their mascot, Phillie Phanatic, is considered the best in baseball.  Features of their ballpark include:
  • The Angle
  • Ashburn Alley
  • Liberty Bell {lights up for home runs}
  • Veterans Memorial
  • Memory Lane
  • Rooftop bleacher seats
Also under consideration are these sayings by Phillies players and announcers:
  • Moon Shot.
  • Ya gotta believe.
  • Swing and a long drive. That ball is outta here.
  • When it is time to go out on the field, we all go out through the same door.
  • For who? My teammates. For what? To win.
  • Half of this game is ninety percent mental.
  • Root, root, root for the Phillies
Looking at this increasingly long list, piecing them on the back might be the best plan. It seems very hard to keep creating this wide, even cursive. Besides, I've been itching to try free-piecing letters.

What words have you found for your project? How are you planning to add them to your quilt? Kaja and I created a new Pinterest board, Alphabet, with a variety of pieced and appliqued words and letters. It's a good starting point to spark your own ideas.

Just in case you're still working on with Chinese Coins, take a look at Patricia's quilt for Nora combining Coins with words. Wish I'd thought of that.


Eli Leon, African American Quilt Collector

A friend forwarded this article about Eli Leon. In the 1970s Eli began collecting African American quilts in Berkeley CA. After winning a Guggenheim fellowship, he travelled across the South to research and purchase more of this art. Eli 
posited, "There were African survivals and enduring African influences in African-American quilts, and that quilts made by African-Americans reflected the survival of a cultural identify under siege." He mounted several local and national exhibits from his extensive collection. Sherri Lynn Wood wrote more about him here and here.

Enjoy the day, Ann

InLinkz removed because it was hacked.

Tuesday, July 25, 2017

AHIQ 23: What Would You Say?


CCII

I'm continuing the multi-color border around all sides of this quilt but still have doubts. No matter what color is added, it needs something else. Right now it feels like it needs more blue, navy and perhaps purple. But I've cut too many reds. Although the yellow is much lighter, it adds some fun to the pennants. Maybe...

Continuing multicolor outer border, CCII

#AHIQwords

Kaja and I discussed some ideas and I spent even more time wondering what invitation to extend this quarter. We don't want to push specific blocks. Much as I love scrap quilts, this is not a scrap challenge. AHIQ encourages people to look at their fabrics for the story; to step away from perfect purchased designs and instead explore patterns that speak to your own heart, to discover your own voice.


Several times I've written about my desire to try new-to-me techniques. Although I frequently thread write and even quilted school chants over one quilt, I've never pieced or appliqued words. Why? Well, it's time to change that.

I love Janet Stone's abecedaries. Each is so different. I've read she plans to make twenty-six, one for each letter in the English alphabet. Ricky Tims interviewed her for TQS at the 2016 Quilt Festival.

Then there are phrases on quilts. Some, like Audrey at Quilty Folk and LeeAnna at Nifty Quilts, add nouns to the border. Others, like Monica at Lakeview Quilting, piece a poem or joke. Em enclosed one sentence inside another. Lynne at Patchery Menagerie lists many uses for leftover chicken.

Lorina Bulwer embroidered such long messages or protests across her quilts, they appear to be pamphlets.

Of course, you could simply write your name as Gertrude Knappenberger did on this quilt now in the collection of the American Folk Art Museum.

From the American Folk Art Museum collection,
possibly by Gertrude Knappenberger

Let's raise our voices. Consider how different it would be if we actually stated our goal or reason on our quilts instead of waiting to see what others read into it. Whatever way you choose, I hope you'll consider adding letters to a quilt this quarter.

Enjoy the day, Ann

InLinkz removed because it was hacked.

Tuesday, June 27, 2017

Tartan Diamond in a Square and AHIQ 22

Today is the third month of Kaja's #AHIQtwoblocks invitation. I'm on pins and needles to see what everyone has done even if, like me, you're not finished. CCII: Stacked Bricks is going to be my two block quilt; the second block forms a border. The background squares created by the Coins reminded me of a quilt I made years ago.

Tartan Diamond in a Square began with leftover Half Log Cabins/Housetop blocks. The bright, colorful ones quickly went into a simpler scrap quilt. These remaining blocks were so dull I almost donated them until... That plaid fell on those dull blocks and a perfect match was born.

About that plaid. I'd been on a business trip and wandered into WalMart one evening. This was before they standardized their offerings at every store so there was always the chance of finding something unusual. This fabric was on top of a station. From a distance it looked woolen and like the Sirens of old, it called to me across the store. I only bought 1.5 yards. {Why? There was certainly more and it was on sale.} Every scrap went into this quilt. In fact, that's why the inner section is not symmetrical.

Can you see the two block setting? It a bit of an illusion.

Tartan Diamond in a Square

The first block is composed of four Housetops.

Tartan Diamond in a Square detail
with Half Log Cabins/Housetop blocks

They alternate with a simple dark or light centered block sashed with a loud plaid. Because the Housetops had subtle color variations I didn't want a single fabric in the alternate block. Neither did I want an obvious pattern. So I sewed two fabrics together, cross cut, and spun the resulting squares into a simple whirligig.

Tartan Diamond in a Square detail of dark block

While it contains some of the same shapes as the Housetops, the larger rectangles add some needed scale/shape variation.

The colors and layout fool the eye into seeing a different layout. Although more subtle than CCII, the plaids and bright purple posts seem to float in front of a background of duller dark and light. This quilt taught me that blocks don't always have to be the focal point.

Tartan Diamond in a Square detail with light block

Of course I wanted a large quilt so I combined aspects of the Amish Diamond in a Square with Middle Eastern rugs to create the border. The two different bright blues on each section define crisp edges. Creating the checkerboard in tans tied it back to the golden browns in that crazy plaid.

Tartan Diamond in a Square border detail

The stems of the vines were the only guidelines drawn for all this free motion work. I'd been told quilting doesn't show on prints so I used 40-weight thread and fearlessly quilted across the narrow borders. The work only shows on the lights but it was a joy to sew.

Tartan Diamond in a Square border corner detail

Sharp eyes will notice the same Alexander Henry fabric from my Thirty Year Sampler in the border and binding.

Quilt Details
Size: 84" x 102"
Design: Two block quilt with Housetops and original block
Batting: Mountain Mist Blue Ribbon100% cotton
Thread: variegated cotton 40 wt. thread
Quilting: SID and freemotion quilting, various freehand designs

Many two-block quilts are alternate blocks but there are other ways to combine them. Chaos #5 by Erin Wilson and Sunday Best by Michelle Wilkie demonstrate unconventional ways to create quilts of two or more blocks.

Enjoy the day, Ann

InLinkz removed because it was hacked.

Tuesday, May 23, 2017

AHIQ 21 - Two Block Quilt Progress

I've been thinking about a second block for CCII. Oddly alternating choruses: Slow down versus move it along; try something new versus repeat something I can create with ease.

I thought this quilt would look more like Nettie's Stacked Bricks. Instead it's taking on a bright "Freddy Moran-vintage" feel. Like our children, we have many plans for their future but, to be truly successful, they make their own choices.

Stacked Bricks center

Whenever I go to a show or meeting, I think, "If a natural disaster strikes, which one will I save?" Not steal. But I could only carry one. There are so many quilts {and parts of quilts} I admire. Among my favorite quilts are ones with nuance and depth to their work that still appear handmade and touchable. These are the quilts I would save from natural disaster. A trivialization of Sophie's Choice if you will.

What does this have to do with anything? I don't want to copy but rather to let ideas percolate and metamorphose until I find a way to incorporate aspects I admire. Like the suns in Kaja's Little Bird which also remind me of my Cowboy Fireworks made using Sujata Shah's Cultural Fusion Quilts. Kaja's are rectangular and I think she individually cut her rays. How would it work with a stack of fabric instead?

Cowboy Fireworks quilt

What if I made star points instead of sun rays? I have some paper pieced New York Beauties in progress for years. Yes. I still think they're beautiful, still like the colors, and still plan to finish. I don't want to start a second one now. {I can't keep up with the papers already.}

Paper pieced New York Beauty
blocks, still in progress

Several years ago, Tim Latimer made a Suspension Bridge quilt. {His post also includes photos of a housetop quilt in progress and Kaja's been using that block. Hey. It's the circle of life, or at least the circle of coincidence.} What charming awkwardness of the points. He didn't paper piece. But he did write a post about his process: Tim's Suspension Bridge piecing.

So... How improvisational do I want to be? What method will work best for me?

How about you? I'm setting aside a couple of afternoons to read all the posts in detail. Be sure to check in with Kaja for more insight into two-block quilts.

Enjoy the day, Ann

InLinkz removed because it was hacked.

Tuesday, April 25, 2017

Neutral Strings Quilt and AHIQ #20

After washing and rebinding this quilt, most of the waviness is tamed. Not gone. It's worked into the interior though and doesn't show as much on the edges.

Love the striped binding. Remember it was printed with bias stripes so it's cut straight but appears to be bias. That straight of grain binding also helps tame waviness.

Neutral Strings baby quilt finished

Quilt Details
Size: 38" x 38"
Design: String
Batting: Mountain Mist Cream Rose 100% cotton
Thread: Guterman tan cotton
Quilting: Spiral design with walking foot

Oddly, this was the dregs of the scrap bag - what I call the "swash zone" - that stuff you leave each time you empty the bag. It's turned into one of my favorite quilts.

My biggest mistake was pulling the quilt package as the walking foot wound the spiral. I should have placed my hands to offset the bias stretch rather than emphasize it. If I'd done that the quilt would lie as flat as each layer did.

The waviness should continue to wash out at the quilt is used. Fortunately it's designed to be used and washed frequently.

Previous posts:
  1. Piecing the top
  2. Piecing the back with Stephie's scraps
  3.  Spiral quilting
Last quarter AHIQ worked through Chinese Coin variations. Check last month's linkup for enlightening results and ideas by other quilters. I've been preparing for our show, traveling, or fighting a cold most of this month so haven't progressed much on my CCII. I know many of you are still finishing yours and hope you link more this month.

The best news is IT'S KAJA'S TURN to lead the #AHIQ2017Invitational! This quarter she will be sharing an improv method that's been striking her fancy recently. I can't wait to read the details and start learning from this master improvisational quilter. Head over to Kaja's Sew Slowly blog for all the details.

Enjoy the day, Ann

InLinkz removed because it was hacked.

Tuesday, February 28, 2017

AHIQChineseCoins and AHIQ #18

Can you believe it's been a month since we started #AHIQInvitational?

Originally I called this a challenge but there are enough challenges of every sort in the world right now. So, let's call it something friendlier and more inclusive: an open invitation. For the first quarter of 2017 we hope you'll explore at least one variation of the Chinese Coin design. If this is your first visit, refer to the inaugural post here.

I've been working on a Chinese Coin quilt that will be a housewarming present to my niece. As usual, it's a learning opportunity. There are many variations but I felt she would prefer something quiet and restrained. Her colors are light blue, yellow, grey, and white. {Not my typical style. Not my personal choice of colors. A good challenge on many levels.}

In keeping with a quieter quilt, I used a striped effect. Each column was originally composed of a single pair of blue, yellow, grey or white fabrics pulled from my stash. When those ran out, I took strips from the scrap bag. For the final column (far left) I snapped this photo to help decide between the two lights. The top light is too beige so I used the cream with yellow poppies on bottom.

Columns of Chinese Coins ready to arrange

Once the columns were done I had to work out the order and decide whether or not to add sashing. Here are some of the fabrics I tested. The only one that seemed to add anything to the conversation was a dark grey hand-dyed remnant from Jonathan Shannon. Since that has only enough for one or two sashings, this quilt won't have any.
Some possible sashing choices for Chinese Coins

Moving the blue columns further apart while keeping the soft columns on the outside looks better. Although this top was ready to layer and baste, I realized I'd never shown some of the strip sets that were discarded. 
I thought this top was done

All I did was  position a few strip sets on top for a quick comparison. One is the yellow and brown plaid with floral while the other two were still lurking in the scrap bag.

Chinese Coins quilt top
with darker sections laid on it

They are too dark and dull but made me realize I like the way these block sets break up the long columns. Once they were taken off, the quilt looked awkward. Trying to use good art principles, I positioned variations a quarter or third of the way in rather than at the midpoint. But a good plan for a single column makes a problem when several a sewn together. The middle has a "bare" look and the darker blue column on the left and this middle column change colors at the same point.

I also noticed I sewed the right-hand blue column upside down.  {If I'd sewed that correctly it would have added more coin change variation.} Those seams were cut freehand so there's no turning it now.

After an hour playing with various strips {some of which were too short to use} I finally replaced one section of three. It's easier than it sounds. I unsewed the original trio, sewed a new set, pressed both, overlaid the original on the slightly larger new, and cut the new to fit that shape. No worrying about individual strips; it's the final size of the group that matters.

Replacing a section of one column

And here's the result. A very minor change: two whites substituted for two yellows in the middle. But it adds a bit of change in the middle of the columns.

Chinese Coins quilt top, final arrangement

That middle column still contains only three fabrics: blue, yellow and a Marimekko print. I've only reordered it a bit.

Value has been an object lesson for this quilt. Although they don't cover the entire spectrum, the quieter colors still need a range of values. Another discovery is that prints react differently with lower contrast colors. The grey and white column on the right and the yellow floral and plaids {that I excluded} are cases in point. As yardage these prints appear quite different but when sewed, they blended together more. Some were almost mushy. Value is more important than color.

Now I look forward to reading about your projects. Please include your current work, whether or not it's a Chinese Coins project. Everyone is welcome: beginners to experienced quilters. Over the past year we have noticed a wide diversity of construction techniques and specific areas of interest. It's not just a "photo op." Share what you've learned and join our exploration of improvisational and utility quilting.

Enjoy the day, Ann

InLinkz removed because it was hacked.

Tuesday, January 24, 2017

AHIQ 2017 Invitational Begins and Linkup 17

Kaja and I plan some changes to AHIQ this year to help newer quilters embrace this movement. Even experienced quilters have written of their diffidence with improvisation so we hope you'll enjoy our Invitational, too.

We invite you join us as we start a new quilt idea {or kernel} each quarter. The first month will introduce our quarterly theme. We'll share our progress the second month as well as our improvisational ideas. There could be finished tops to share by the third month. We hope you will write and link posts on your progress monthly.

Participation in our AHIQ 2017 Invitational is entirely optional. Continue to post your current improvisational or utility quilting, too. It wouldn't be improv otherwise.


#AHIQChineseCoins

I'm starting this party with a Chinese Coins strippy quilt. While making one last year, several more ideas occurred to me, always a good sign. This design can easily combine scrap quilting and improvisation. It's friendly to both traditional and artistic styles, beginners and experienced quilters, and has more variation than you might expect.

Chinese Coins or Roman Coins probably refers to the fact that these highly developed civilizations created standard coins quite early. At its most basic, rectangular scraps sewn together like stacks of coins form columns. These are sashed with lengths of a single fabric... or not.

There are few exact instructions. The strips can be any width or height as can the sashing and these can vary from one column to the next. You can even omit the sashing. Columns can be turned vertically or horizontally. I've seen strip columns made of crazy piecing, UFO blocks, and selvedges. {Some people would classify these types as strippy quilts but let's be more general.} Repeating the sashing fabric in some of the strips gives an open grid design.


Traditional Example

This is a philanthropy quilt I made years ago. The sashing was cut from a single striped Halloween fabric. Six-inch-wide coins of various heights were sewn together randomly until they matched the length of the Halloween fabric. Everything was cut with rotary tools. Notice the same fabrics appear in each column.
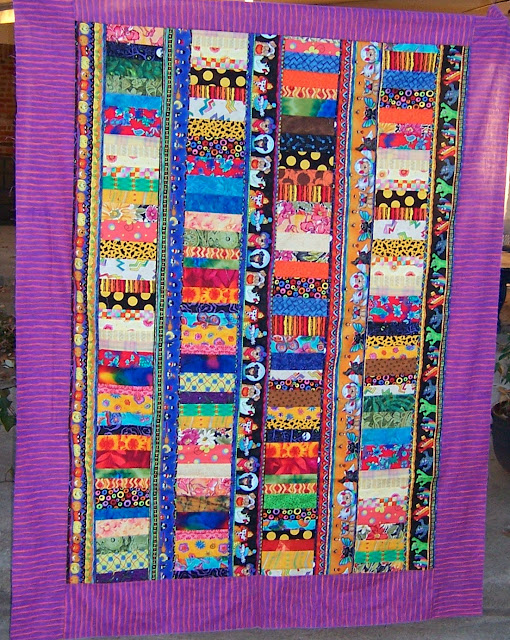
Striped Halloween fabric forms sashing between columns of colorful coins to create this happy quilt.
Halloween Chinese Coins scrap quilt
Improvisational Example

Next is a more improvisational version of Chinese Coins. Each column contains only one of three sets of fabric. Many of these came from my scrap bag but there are also remnants and yardage in it. I used both rotary tools and scissors to cut the strips. Once the columns were sewn, I butted them together to trim overlap and determine where vertical strips were needed to fill empty spaces. More notes about this quilt on posts listed here.
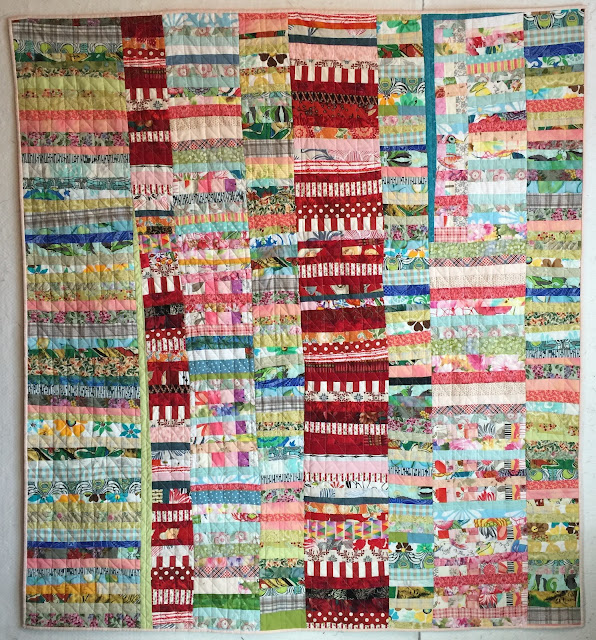
Stacked Coins, Chinese Coins or Roman Coins in reds, pinks, blues, and greens.
Chinese Coin Improv string quilt
More Examples Across the Internet

Here are a variety of quilts that push the boundaries of Chinese Coins classification. Some are more improvisational than others. Most of them have additional aspects so their makers may not consider them Chinese Coins. I group them because they have a basic design of stacked strips in columns (or rows).

Sometimes the simplest construction highlights the most masterful quilting. These are listed first because of their straightforward {basic} construction. But make no mistake. Each of these is a masterwork of fabric, layout, and style.

Chinese Coins by Freddy Moran, used with permission. Photo by M Beach
  1. Freddy Moran made this Chinese Coins with her signature colorful fabric.
  2. Gina Abayan of the Philippines created her quilt from solid fabrics only. She rotated her work 90 degrees so the coins are vertical. Her columns (now rows) appear to be hand-cut but about equal width.
  3. Wanda at Exuberant Color also rotated hers. She organized her printed fabrics by value so well that you can almost see the sun highlighting this quilt.
  4. Cassandra Ellis lists the variety of "found fabrics" used in Katie's Quilt in her post. It's also rotated. {Am I seeing a theme?}
  5. Edeltraud Ewert created one of my favorites which seamlessly crosses boundaries between traditional, improvisational, and even modern. Art at it's best.
Applique can easily be incorporated into this design.
  1. All a Flutter by Judy Crane appliques trees, leaves, and birds on a Chinese Coin background. Notice the strips are divided by color and the coins are rotated again.
  2. Mel Beach used a McCall's pattern to applique cheerful floral vines with cute buttons on the sashing between her Coins. As usual, her color sense delights.
If you want to try more challenging improvisation or think Chinese Coins is too simple, look at these three quilts.

Improvisational variation of Stacked Coins quilt in green, yellow, tan, brown, and white.
Build Me a Wall by Kaja Ziesler, 2016 (Used with permission.)
  1. Kaja's Build Me a Wall incorporates vertical strips (rather than sashing) and reverse applique squares into a basic columnar Coin layout. Her middle section divides into two columns at the top. Notice the visibility of each column despite the fabric repetition. The vertical seams create their own boundaries. Her borders unify the composition without encasing it.
  2. Sue Kelly recently made a top based on Point Reyes seashore. Her final version reminds me of horizontal Chinese Coins with sashing strips in several colors and widths.  
  3. Nettie Young of Gee's Bend created Stacked Bricks in 1928. Her quilt is composed of rotated double brick (or coins) columns that are sashed and posted.
Do you need still more inspiration? Check out my Chinese Coins Pinterest board or Google "Chinese Coins", "Stacked Coins", or "Strippy quilts."


Getting Started

Although we are approaching this improvisationally, I was planning to write instructions to aid beginners until I found Mary Johnson at MaryQuilts and HeartStringsQuiltProject already posted great directions. Her traditional version guides you through the basic construction.
  1. Overview on Chinese Coins quilt.
  2. Construction directions.
How much fabric? Assuming a 50"x60" quilt {without borders or sashing} and 2"x5"finished coins, you will need between 2.75 and 3 yards of fabric. Changing the coin sizes, adding sashing, or any other variations will alter the yardage requirements.

Are you in? Then go through your scraps, remnants, and yardage for the colors and fabric that speak to you. Try sewing some coin blocks or units. You don't need to sew an entire column all at once. Let's meet back here next month to share where we are, what we've discovered, and any questions we have.

Be sure to tag your photos with the hashtags #AHIQ2017Invitational and #AHIQChineseCoins so everyone can find them more easily on social media.

Enjoy the day, Ann

InLinkz removed because it was hacked.

Tuesday, December 27, 2016

Bordering Plan and AHIQ December 2016

As several people noted there's not enough fabric to extend onto all sides. The solution is to use different borders. Thanks for all the great comments on my previous post; they gave me several ideas for incorporating different borders and adding applique.

Julie reminded me of Susan McCord string pieced leaves border on Barbara Brackman's blog. Love the graceful way she incorporated the leaves and vine.  Sue Nickel's New York State of Mind has three different borders. There's another I've been considering that combines zig zag and applique borders. I thought it was Freddy Moran's quilt but can't find it online or in my books.

I measured then measured again but no more fabric appeared. With the narrow chartreuse inner border the quilt now measures 63" by 75". Because there are two different birds, the toile cut into two 6.5" borders: the first is 84" {two strips} while the other is 124" {three strips.} They will fill one short and one long side.

The blue gingham could be cut into three 10" strips but only 129" or four 7" strips that are 172". The final choice was four strips because it's the only way to fit the final two sides.

Here's what it looks like laid on the kitchen floor. Quieter than I realized.

Spiderweb quilt with blue borders

Next is to decide which border extends to the edges - the applique or the toile.

As usual lately, this is not the most improvisational quilt. However, I had visions for the border but didn't have enough fabric to carry it through. On to Plan B which is turning out better than the original idea. That's my bit of improv.

With the bird toile attached, I'm considering appliqued birds on the blue gingham. Another adjustment since my first idea was vine with leaves. Second was adding flowers. I'm working much more slowly than normal because of the holidays, diffidence about my applique abilities, or actually thinking about the results. Not sure what proportion each is playing.

Kaja and I have plans to start quarterly improvisational challenges next year. We hope quarterly will allow more time for all of us to complete other, personal work but frequent enough to see progress on improvisational topics. Check us out next month for all the details!

Enjoy the day, Ann

InLinkz removed because it was hacked.

Tuesday, October 25, 2016

AHIQ Linkup October 2016 and Quilting Spirals

Between this small quilt and the t-shirt quilt I haven't started any improv this month. But the quilting design has free-hand aspects. After some ditch quilting with a walking foot, I decided to quilt spirals on the inner border.

Why? Because the thread is a bit heavier and tends to knot up if you change directions in a point. Spirals have no sharp points for knots to form.

Free motion spirals without echo quilting

I used a glass to mark circles. This keep the spirals reasonable spaced. But it still takes practice to maintain spacing during the inward and outward spin.

A glass makes a good
template for spiral placement

Adding a line of echo stitching on each side of the spiral will fill out this border.

Enjoy the day, Ann

InLinkz removed because it was hacked.

Tuesday, September 27, 2016

Vintage Utility Quilt and AHIQ September 2016

It's time for another utility and improvisational quilt linkup. What have you been doing?

I've been away so long my sewing space looks very cluttered and crowded. I've been trying to clear out the partially finished pieces. Also, my fabric appears to have had babies while I've been gone. Time to sort through it.

DH's grandmother made this quilt in Wood County, Texas. I slept under it the last time we were there. Rod Kiracofe's collection includes at least one quilt from Wood County. There are a couple of places that need mending. I'm planning to bring a bit of old fabric to applique over the fraying sections and preserve the fabric underneath.

Scrap strings edged with pale orange. Border of pastel yellow and orange.
Scrap quilt from Wood County, TX

The hexagonal lozenges may have been pieced on newsprint although the entire quilt is hand pieced and quilted. The orange solids are set in with Y-seams. It's also unusual for the yellow and orange borders. She finished it with Baptist fans.

Enjoy the day, Ann

InLinkz removed because it was hacked.
Tuesday, August 23, 2016

Rod Kiracofe Presentation and August 2016 AHIQ Linkup

It's hard to get back to my old routine after taking off most of the summer. Quilts were left in progress  and I've had trouble remembering the plans.

While still a difficult time, this month has been more fun. We drove across the western US. As schoolchildren we learned a line called the Continental Divide separates rivers flowing east to the Gulf of Mexico or Atlantic from those flowing west to the Pacific. This is not quite true.

The Great Basin encompasses about a fifth of the country from the western Rockies to the eastern Sierra Nevadas. Water in this area flows nowhere. It can only evaporate leaving alkali beds, salt flats, and several salt lakes. The Great Salt Lake is the largest, but there are several more.

Mono Lake from a distance

 Mono Lake is one of them. It's so salty birds have trouble paddling in this lake; they're too buoyant. Tufas formed by fresh water springs famously tower above the lake's surface, in part because the lake has been drawn down to transport water to other parts of California.

Closeup of tufas at Mono Lake

Fortunately, this is no longer allowed. Unfortunately, the west has been in such a severe drought that the lake level is still falling.

Rod Kiracofe was the guest speaker at our quilt meeting yesterday. Although not a quilter, he has done more to advance quilting as important American art than anyone I know. Starting in 1983, The Quilt Digest juxtaposed antique works with contemporary art quilts highlighting the commonalities. He went on to write The American Quilt, a seminal work that displayed the development of quilting designs and styles through time when other books organized material by block design. As a maker, I learned skills from the latter layout, but as a student my understanding was enriched by Rod's history.

One-patch quilt of randomly sized rectangles.
One-Patch quilt from the collection
of Rod Kiracofe shown at SCVQA meeting, 2016

I believe his greatest genius is, as he wrote in Unconventional and Unexpected, his "practice of creating new ideas in the larger cultural conversation." This is most evident in the exhibits he curates where he opens my eyes to relationships between different groups of people or art. For example, his exhibits last year at the San Jose Museum of Quilts and Textiles and at the Sonoma Art Museum.

Long rectangles, possibly men's hatbands, create this white, navy, black, tan, and red quilt.
Improvisational quilt,
possibly from men's hatbands.
Rod Kiracofe collection.

Hearing him again has reignited the need to quilt.

Edit: Monica suggested that since we both host this linkup Kaja and I each add our posts below to help others visit both. Such a good idea. Thanks!

Enjoy each day,
Ann

InLinkz removed because it was hacked.

Tuesday, July 26, 2016

July 2016 AHIQ Linkup

This difficult summer is coming to an end. While I still haven't found much time or even inclination to create, I did finish my Crafted Applique pillow using Lara's method.

Crafted Applique pillow with down insert

The applique holds up well on the selvedge background since it is also stitched about an eighth of an inch from the raw edges. It looks even better with a squishy down insert.

Pillow back with hidden zipper

Once again ChrissieD's tutorial helped create a deep hidden zipper on the back.  Her instructions are very clear and, because the zipper is installed first, it's one of the easiest ways I've found to close a pillow. Additionally, the deep placket makes the back more interesting; so many fabric choices. My previous pillow is here. Both of these were gifted away. Next time I'll make one for myself.

Have you been following Kaja's delightful lighthouse quilt this year? What a gloriously original quilt.

Enjoy the day, Ann

InLinkz removed because it was hacked.

Tuesday, June 28, 2016

June AHIQ Link Up

I recently found the first quilt I made with the Drunkard's Path templates. I used these same templates with Polka Dot quilt earlier this year.

One-inch fabric strips in orange, yellow, green brown, black & white create this Drunkard's Path variation.
Strips and Curves quilt using Drunkards Path template

Why does my computer quit whenever I'm out of town? I'll resize the photos when I can... Here are some detail photos. It was loads of fun to find and add the different animals. Jaguar and giraffe.


Tiger.


Zebra.


Family issues continue to take all my time so I haven't done anything new. But hopefully you have utility and improvisational quilts to share. Be sure to check out Kaja's Sew Slowly for a good read. See you next month.

Enjoy the day, Ann

InLinkz removed because site was hacked.

Tuesday, May 24, 2016

May 2016 AHIQ Linkup - Utility and Improvisational Quilts

Not much quilting here but I attended Blanket Statements at San Jose Museum of Quilts and Textiles recently. Kaffe Fassett juxtaposed antique quilts from the Quilt Museum (now closed) in York, England, with a contemporary rendition from his studio. A contemporary example appears in the background of this post. The colors are much brighter but the historic roots are readily apparent.

Below is a detail of the antique scrap Wheel quilt, maker unknown. The outer side of the wheel is curved but the inner side is straight. There were usually two congruent wedges in each wheel but the layout alternates light and dark.

Wheel quilt detail at San Jose Quilt and Textile Museum exhibit.
From Quilters' Guild Collection, York, England. Maker unknown.

Now look carefully at the purple-circles-on-white fabric in the photo to the right. The quilt has been mended! And the mender didn't want to sew those curves. S(he) simply made straight-edged templates for the damaged sections. The careful mending with good but used fabric indicates to me that s(he) was capable of sewing the curves but chose not to do so. I wonder if the maker's daughter made these repairs. What happy memories she relived while mending this quilt for more year of use by the family.

EDIT: I found a photo of the entire Wheels quilt on the Quilters Guild Connection (UK) website.

I hope you either had a chance for some quilting or a good time with your family.

Enjoy the day, Ann

InLinkz removed because site was hacked.

Tuesday, April 26, 2016

Freddy Dot Com Top and April AHIQ Linkup

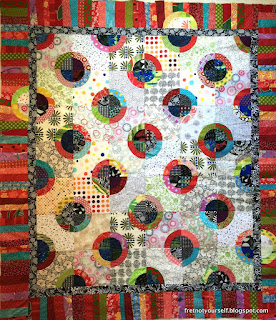
Except for the border of my polka dot quilt I haven't done much improv quilting this month. Free-hand cutting the border was very relaxing and worked well. Here's the finished top.

Polka Dot quilt with improv string border

I decided to leave one border undotted... just to be different.

What about you? What did you do this past month?

Enjoy the day, Ann

InLinkz removed because site was hacked.

Tuesday, March 22, 2016

AHIQ Link Up March 2016

Lately I've been quilting tops. Most are scrap quilts, although I'm getting ready to quilt the sawtooth improv. I use dry erase markers on a 30"x30" piece of vinyl to preview quilting designs. To keep any residue off the quilts, make sure the same side is always on top. The easiest way is to put painters tape around the edge of one side so you always know which side is up.

Trying out quilting designs on an overlay vinyl

I thought about quilting the zigzags and echoing them on the muslin. (That's my plan on the right.) Tami and ML came up with the better plan on the left.  We all agreed I should stitch in the ditch around the zigzags. So there will be many threads to bury and it will take a while.

Tami pieced a fabulous top based on the Rhythmic Grid score. Take a look. These are her favorite colors - although the entire group would be willing to take this one home!

Enjoy the day, Ann

InLinkz removed because site was hacked.

Tuesday, February 23, 2016

February AHIQ Linkup and Designing a Quilt Back

The kaleidoscope quilt needs a back and I want to use fabric on hand. Making large blocks like the planes on the back of Propellers and Planes is fun but nothing seemed to work with this top.
Finally I pulled orange/peach fabrics. There were two one-yard pieces and a quarter-yard remnant. That fills up half of the 77-inch back. Then I sewed all the leftovers into long strips. Finally I cut the first set lengthwise about one-third of the way across. These sections go on either side of the strip set. (Hopefully I can get a full photo later. Sorry.)

Width of fabric yardage creates half; then leftover strip are sewn randomly to fill in.
Large WOF fabric cut lengthwise
and filled with leftover strips 
to form a quilt back.

It occurs to me that this is a simple recipe for a back.
  1. Create a large WOF unit from one-three large pieces.
  2. Cut this unit lengthwise and/or width wise.
  3. Fill along the cuts with leftover strips and/or blocks.
  4. The original unit forms the outer sides or outer corners depending on how many times you cut it.
Enjoy the day, Ann

InLinkz was removed because site was hacked.