Tuesday, December 29, 2015

Metamorphosis and December AHIQ Linkup

I'm still working on the sawtooth quilt. As I wrote in my last post, the original thought was to alternate strips of triangles with a tan or beige sash. Part of the inspiration came from Serenity Now by Lara. Isn't this a calm, sophisticated quilt?  (Of course, she has diamonds that point lengthwise and no sashing.)

But then...
Sujata posted a photo on Facebook of a vintage Ghanaian textile, asking if it inspired anyone to make a quilt. Of course I loved it; it was RED. Narrow strips were woven then sewn together to create the width. Did you notice the areas where the weaver substituted white for red?

Esther Fitzgerald Rare Textiles
- early 20th century, Ewe people, Ghana

It could be interpreted in two sets of Seminole piecing, but that almost seems too literal.

The sawteeth were progressing. While sewing more units of six, I had an epiphany. These rectangular units compare to the red rectangles in the Ghana textile.

Testing different background fabrics
with the sawtooth units.

I pulled quiet cream/white fabrics, quickly deciding white was too severe. Next I pulled browns, tans, yellows or reds to create an insert. The Ghana textile called for bright red; the recipient called for neutral. After cutting a few samples, I got lucky. M-N suggested combining the red and yellow polka dots after dinner one evening. Later I remembered this quilt in Rod Kiracofe's last show.

Quilt from Found/Made show by Rod Kiracofe,
San Jose Museum of Quilts and Textiles.

The way the maker cut and seamed along half the polka dot, sometimes matching the colors of the dots and plaids, is masterful. Thank you for the guidance, M-N!

Deciding between dark red
and mustard yellow polka dots.

The yellow reverses to blue which added a subtle variation. Although I tried fussy cutting, the dots on my prints are much smaller than Rod's. My polka dots roam free.

Some sewed inserts with the reversible fabric.

I chose to keep as much of the sawtooth units as possible and optimized the cutting lines to that end.

Blue sawtooth sets on muslin background strung together by narrow strips of maroon, soft yellow or pale blue dotted fabrics.
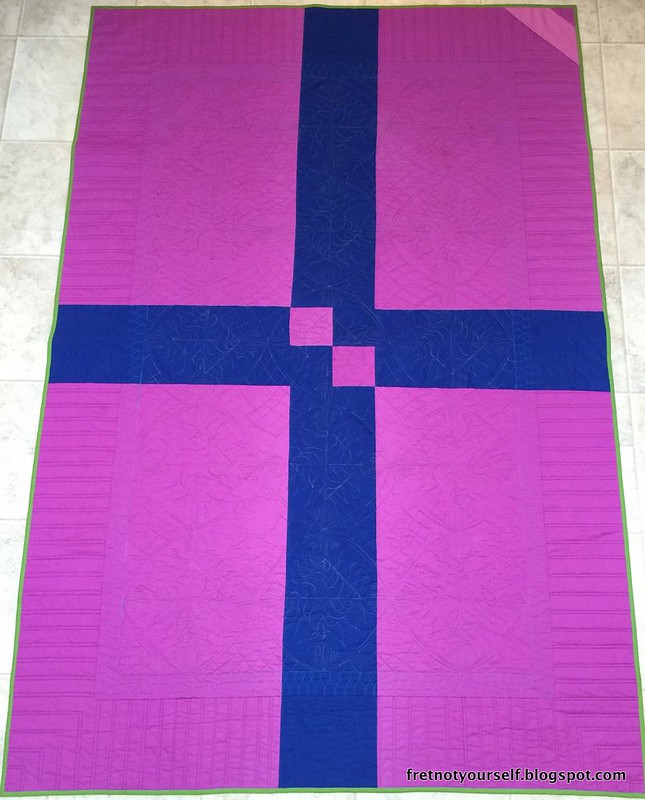
Improv sawtooth quilt top

This quilt underwent a series of unexpected changes during construction. Evolution or metamorphosis? Did it change in response to external forces or was this quilt always there but needing time to develop? It was beneficial to look, listen, and ponder - steps I intend to do but frequently neglect to take the time. I'm so pleased with the top; the recipient likes it, too.

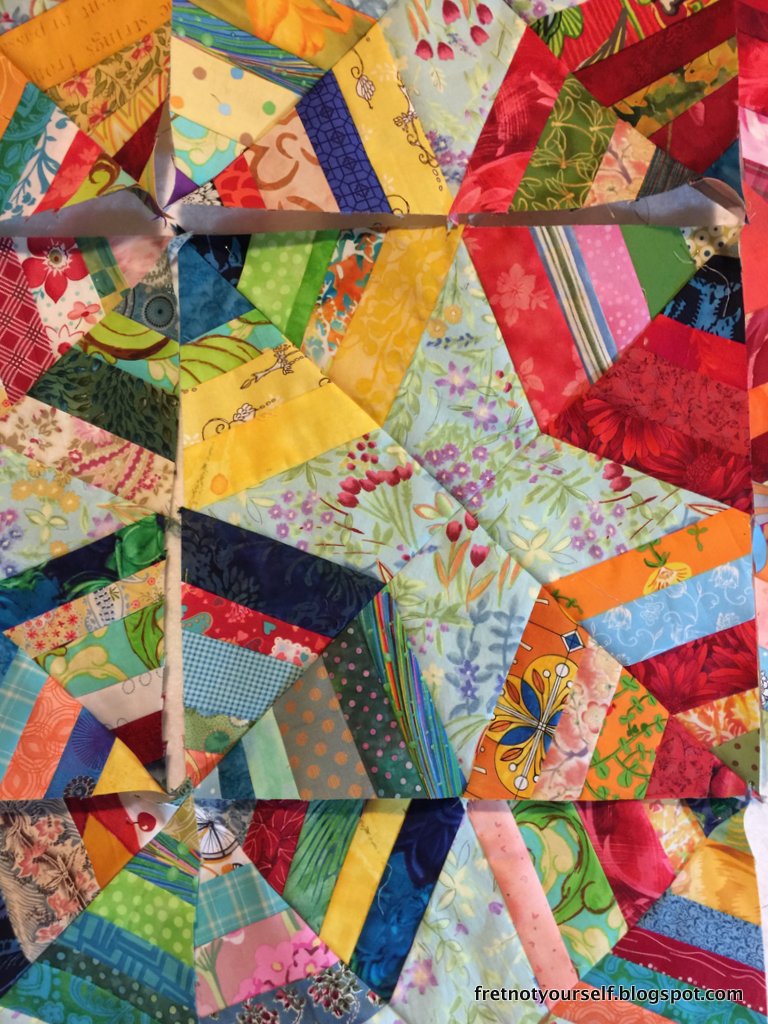
Detail of improv sawtooth quilt top.

It's on the design wall while I ponder quilting designs.

Enjoy the day, Ann


InLinkz removed because site was hacked.


Monday, December 21, 2015

Doodle Quilt

Our book study group is currently on the doodle quilt in Sherri Wood's Improv Handbook. One month we simply doodled in our sketchbooks. ML led the meeting, posed thoughtful questions and kept us (ok, me) on task. Clockwise from top left: Tami, MK, 5 pages by M-N, me.

Doodle sketches from Improv book study

Tami and I discovered our first sketches were quilting designs; we had to lift the pencil to create piecing designs. She chose to explore assembling orphan blocks and other leftovers and may use a round robin/medallion format.  MK decided her striation layers called for more study. I like the Housetops (or quarter log cabins) and want to repeat them in more colors. But my doodle blocks will start with long sawteeth or triangles.

M-N had the most interesting sketches. Starting with discrete units, she connected them with theatrically motivated designs and realized she had sketched The Odyssey! Hopefully she'll write a post about it soon.

We spent another month sewing some of these ideas. I considered restarting to center more on Sherri's guidelines but finally decided to continue with one design. I cut the rectangles freehand but used the ruler on the diagonals. 

In the mean time...

Another friend is graduating college this spring and wants a quilt. Since she attends LSU I expected purple and gold but instead she likes blue and neutrals. It seemed like a good idea to make the sawteeth in her color scheme.

Blue and cream fabrics cut into long triangles

Lots and lots blue and cream/beige sawteeth. My first thought was to sew rows of teeth the length of the quilt and separate them with long tan sashing. To emphasize the fabrics, I sewed pairs of matching triangles together. In fact, sets of 6-8 triangles in the same fabrics seemed to work best.

Repeated fabrics make 
strong sets of sawtooth triangles.

Enjoy the day, Ann

Saturday, December 12, 2015

Spiderwebs Need a Border

My computer is still out for repairs and I'm out with a cold. It takes an entirely different skill set to try to post from my tablet. And I can't click any links. But I did get the spiderwebs sewn. Now they need a border.

Jewel Spiderwebs sewn 

Here are some closeups of a few.

Jeweled spiderwebs, detail.

It's still unpressed to keep the sides from stretching. And it needs a border. I've always wanted to make a vine and leaf border. This seems like a good place to put one. But... which fabric for the background? None has enough yardage to go all the way around. Some thinking is in order.

Enjoy the day, Ann

Sunday, December 6, 2015

Quilty 365 Progress

All my technology failed the same week. Both laptop and camera are on the fritz. As I am out of town, it's difficult to recover quickly.
Here's an old photo of my circles - barely a week in. I started November 4 and have twenty-four finished. More are cut, ready to sew as we travel.


Applique circles begun, #quilty365

Linking up with Audrey's December post.

Enjoy the day, Ann

Wednesday, December 2, 2015

Amish Gems - UFO Finished

This is was my second-oldest UFO. We exchanged the blocks in the QGGH Evening Scrap Bee back in 1992. I wouldn't remember but I made a label... for the top. Since then, it's moved with me every time. Good intentions but...

Machine quilting by Peg Collins, Alamosa CO.
Dark and bright solids create
squares on point for an Amish Gems quilt.

I finally realized I will never quilt this. Quilting sister (QS) ordered me to send it to our dear friend, Peg Collins. Her email is collinspeg(at)hotmail(dot)com if you'd like to speak with her about doing some work for you, too. She's so artistic and custom quilts beautifully. In fact, she won a ribbon at AQS a few years ago. So into the mail it went with a note: no hurry, do what you think best.
Details of all the wonderful quilting
on Amish Gems, designed by Peg Collins

Peg used a variegated thread, black batt and her fabulous design sense. How exciting to have this complete and in use for the holidays. It's still pretty after 23 years!

I do remember making the back. There wasn't enough fabric to make an entire back and with all three kiddos covered in chicken pox, visiting the fabric shop was not an option. These two seemed to go together. It's ordinary today but back in '92, this was quite a wild back.

AmishGemsBack


Enjoy the day, Ann

Tuesday, November 24, 2015

Seam Line Variations in Improv and AHIQ #3 Link Up

A frequent comment about improvisational quilting is whether or not rulers to use rulers. Tami and I discussed freehand cutting at a book study. Offhand I can think of four ways to seam; each is a different combination of cutting and sewing.

1. Ruler cut; matched edges.
This is traditional quilting. Do you think it isn't improv? Think again. Many well-respected improv quilters use this technique in some part of their work. (Admittedly, most frequently to square up a freehand block.) Gwen Marston and Sujata Shah come to mind.
  • Cut pieces with a ruler
  • Match the cut edges
  • Sew a quarter-inch seam
2. Free cut; matched edges.
Offhand, this may be what most people call improv.
  • Cut pieces without a ruler
  • Match the cut edges no matter how they wiggle
  • Sew a quarter-inch seam
3. Ruler cut; unmatched edges.
This is a possibility but I don't think I've ever seen it done. The seams can move like matched edges of free cut strips.
  • Cut pieces with a ruler
  • Do not match the cut edges
  • Sew at least a quarter-inch seam
4. Free cut; unmatched edges.
What is this? Just because it's cut a certain way, doesn't mean that's what is wanted. This method smooths out the irregularities. A seam can appear to have been ruler cut if done carefully.
  • Cut pieces without a ruler
  • Arrange the pieces to smooth out wiggles on the edges
  • Sew at least a quarter-inch seam; it may be wider in some areas
Here they are 1-4, left to right, from the back. Look carefully to see where the edges match or not. Because seams are pressed to the dark, the uneven edges don't show well on the last one. I pinned them back to give you a better view.

Back views. Left to right:
1) Ruler cut, matched edges.
2) Free cut, matched edges.
3) Ruler cut, unmatched edges.
4) Free cut, unmatched edges.

And here's what they look like on the front. Notice how the seam line of #3 ruler cut, unmatched edges mimics the look of #2 free cut, matched edges. Similarly, #4 mimics #1. These are only one example of each. I emphasized the waviness to illustrate the seams; there are many different ways to cut them.

Front views. Left to right:
1) Ruler cut, matched edges.
2) Free cut, matched edges.
3) Ruler cut, unmatched edges.
4) Free cut, unmatched edges.

Improv is about choice. Frankly quilting is (or should be) about choice. Cutting and sewing decisions affect the appearance of your quilt. I believe we should follow our own inclinations rather than rules imposed by others. It's one thing to read and discuss; you are still responsible for your own choices. Blindly following dictates from others lessens our confidence and creativity.

Most of us quilt for pleasure. Are you having enough fun? This Subaru commercial expresses the joy we should feel when we quilt. (Google 'Subaru painting easel' to find it on your own.) Don't you wish we all experienced as much drive to create, excitement during the process, and contentment with our results as this man enjoys?

InLinkz removed because the site was hacked.

Enjoy the day,
Ann

Saturday, November 21, 2015

Kaleidoscope Quilt and Peanuts Movie

We have a good friend who shares a love of Snoopy/Peanuts with my husband. Oh, and a birthday! We celebrated this year by visiting the Charles Schulz Museum in Santa Rosa, CA, and attending the Peanuts movie. This past spring I decided to make her a quilt with Peanuts fabric. I'd seen some before this decision but I only found two pieces in six months of searching - one in California, the other in Colorado. (Once the quilt was finished I found a huge selection at PIQF and more at the Schulz Museum. Too late.)

My original plan would not work with only two fabrics. On to plan B. I've quoted Claire Cook before. "If plan A doesn't work, remember there are twenty-five more letters."

I used Marilyn Doheny's kaleidoscope ruler to make the Spiderwebs. There are directions for making kaleidoscopes with strips on the back of the card (which I still have, imagine that.) More recently I saw this lovely quilt by Linda Miller using four or five strips in each wedge. Sujata Shah made another that gave me the idea to wait to fill the corners until the top is on the design wall. (I can't find the link.)

Mine have only two strips, cut 3.5 inches each. Because of the angles, the seam at the top of the wedge is about 5/8". Once sewn, the inner ring becomes smaller than the outer and the blocks finish 11.25".

Peanuts Kaleidoscope
Kaleidoscope quilt using
Peanuts or Snoopy fabric.

I looked through my stash for cheerful fabrics that seemed to go with either the red or blue Snoopy fabric. Those two were used in most of the kaleidoscopes. I made strips of fabric pairs about 28" long and cut wedges with the point on opposite sides. This gave me two sets of four wedges. Then I placed the them on the design wall and rearranged.

Laying out the spiderweb portion of
Peanuts Kaleidoscope

Larger, slightly oversized HSTs fill the corners. Each was cut from a 4.5" square. By carefully selecting triangles, I made some flowers. (Thanks, Sujata!) The blocks were easier to trim because of the extra room in the corners.

Possible flowers in the Peanuts Kaleidoscope

I considered this Jane Sassaman fabric for the border. Using it as triangles looks better than the diamonds but in the end, decided this quilt didn't need anything more.

Considering a border for Peanuts Kaleidoscope

Because this is a snuggly lap quilt, I wanted a looser, all-over pattern. Maria Shell gave me the idea to mix swirls and flowers. Fun and easy.

Quilting details on Peanuts Kaleidoscope

Here's the leftover Peanuts fabric on the back, extended with some random scraps.

Back of Peanuts Kaleidoscope

Quilt Details
Size: 58"(H) x 58"(W)
Pattern: Kaleidoscope variation
Batting: Mountain Mist Cream Rose 100% cotton
Thread: Gutermann cotton thread in orange
Quilting: Free motion on a Bernina 1230

Remember, the next Ad Hoc Improv Quilters link up is this coming Tuesday, 24 November. What have you been thinking about?


Enjoy the day, Ann

Tuesday, November 17, 2015

The Spiderwebs are Haunting Me

It's still clean up/clear out mode around here. I bought shallower boxes for my fabrics so they all fold upright. Much easier to move them and to see everything at one glance. Previously my fabrics and projects were stacked like pieces of paper. It was easy to get lost in the stacks.

Guess what? Those pesky Spiderwebs popped up during the move. I hadn't forgotten them but had been ignoring mine. Everyone else's are gorgeous. See Cathy's here, or Edeltraud's here or Sujata's here or Krista William's here... but mine have not played well together.

First attempt at Spiderwebs, 2014

While clearing out the scrap bag last week, I made more wedges. And I decided to limit the stars to light blue/green. On the left are four different blue stars. Unfortunately that's all of three blue fabrics. Most spiderwebs are grouped by their outer band color. Opinion of my arrangement? Yuck.

On the right the stars are one fabric and each web is grouped into alternating sets of outer band color. (I thought it might look like propellers.) Yuck again.

Spiderweb versions 2 and 3.

"If plan A fails, remember there are twenty-five more letters." Claire Cook

Adding dark strips didn't improve things nor did adding lights. Finally I decided the webs needed more concentrated colors. By now the scrap bag is skimpy; so I cut some new fabric. I sewed new wedges of mostly single colors - red, blue, green, yellow, purple, orange, or pink - placing them to boost the color of each web. Much better; almost jewel-like.

Spiderweb Jewels

Spiderweb blocks are sewn around the star, not the web. I drafted this 12" block myself using a kaleidoscope ruler. Silly me. The wedges needed to be cut 6.625". I should have used an easy measurement for the wedges and let the block be whatever size resulted.

Construction notes: Mine are not paper pieced. I sewed strips together, pressed, then cut wedges for some. Others I eyeballed lengths of strips to form the wedge, pressed, then trimmed with with the ruler. Once I started assembling the blocks, I stopped pressing to keep from distorting the bias edges.

Spiderweb Jewel, detail showing construction

Remember Ad Hoc Improv Quilters linkup #3 is only a week away - Tuesday, 24 November. What do you have to share?

Enjoy the day,
Ann

Saturday, November 14, 2015

Tilting at Hawaiian Windmills

Look what my quilting sister made. I guess she liked the windmills I made from her donation fabrics because she's making one from her leftover Hawaiian fabrics. (That smartie buys these gorgeous prints whenever she vacations there.)

Hawaiian windmills with matching blades
And her second layout.

Hawaiian windmills with random blades

Here' how she finally pieced it.

Hawaiian Windmills with sashing

Enjoy the day,
Ann

Tuesday, November 10, 2015

Don't Leave a Puppy Home Alone All Day

You know what happens when you do, right? That puppy gets into everything, making a big mess... and is usually so proud to show you her results. In this case I was the puppy. Yep.

While visiting my quilting sister (QS) in Colorado this summer she foolishly left me home alone with the lame excuse of work. So I cleaned a bit, read a bit, then noticed the stack of fabrics she'd set aside to donate. According to QS, they didn't go together. Hah, says I.

I'd previously sent her a copy of Sujata's Cultural Fusion Quilts but... she hadn't started on any. Of course! She needed an example. I started cutting. By the end of the day there were 120 squares and some blocks were sewn. Over the week I finished sewing all the squares and suggested she sew it into a philanthropy top. QS gave me the snake eye. Where's the gratitude? Into my luggage they went. Last week I sewed them up. It's major clean up/clear out mode at my house.

Rocky Mountain November quilt

They look well together, IMHO. The fabrics remind me of late fall in the Rockies: the bright foliage is gone, some snow, blue skies and lakes, brown and evergreen hillsides. This has been my recurrent point -  your fabrics will go together. You already curated them when you bought them.

Rocky Mountain November detail

Because of the size, it's now a Veteran's quilt. Thanks, QS.

Quilt Details
Size: 90"(H) x 75"(W)
Pattern: Windmills from Cultural Fusion Quilts

Enjoy the day,
Ann

Saturday, November 7, 2015

Use Those Scraps and AHIQ #2 Wrap Up

Did you read the links in AHIQ #2? Such variety of techniques and processes! Everyone presented their work much more confidently. We are all embracing our path and our discoveries. Modern utility quilts are an official movement. Hooray for us!

After these last few quilts, the scrap bag is overflowing. Even though I want to work on the selvedge strings, the bag demanded my attention. (Weird. Sometimes all the leftovers must be dealt with before I can make myself cut new material. Note to self: consider donating the scraps.) What a jumble of wrinkled fabrics.

First they were divided into three groups: strings, hunks, itty-bitties. The hunks were cut into 3-4" squares without a ruler, paired and cut into HSTs.  If four are alike, they form improv pinwheels. If not, they are just HSTs. As the day wore on the starting squares became larger and more random. However, you can see I need practice making the center points NOT match up.

Random Units Created to Empty the Scrap Bag

Strings go to spiderweb quilt that I've been sadly neglecting.

Itty-bitties are paired up and sewn into slightly larger units. I'm not sure what to do with these; I'm just making a pile for now.

Eventually I found some large hunks that I rough cut into 4x5" rectangles to make Housetops (or half log cabins.) These are interesting. I'm going to leave them on the design wall while I think.

Improv Housetops or Half Log Cabins

Because they are rectangles, it's important to determine which quadrant they occupy. Compare the quartet on the bottom left and right. Oops, on the right. And the sawtooth triangles were made for the New York Beauties. But I forgot to scale the paper correctly when printing. Oops, again. They look good here, though. Nice recovery.

Lots of little bits will make a large stack and perhaps a quilt someday. AND my ability to cut straighter without a ruler is improving by leaps and bounds.

Enjoy the day, Ann

Tuesday, November 3, 2015

Two Improv Round Robins

It's certainly been a busy month with a couple of trips, visiting friends, several quilt meetings, and the PIQF show. Most of my quilting time was spent on the Lobster Boat quilt for my grandson-to-be.

CQFA (California Quilt and Fiber Artists) is a smaller group that takes turns leading workshops. Round Robin from Improv Handbook for Modern Quilters was suggested.  Because I'd previously taken this workshop from Sherri Lynn, when the day arrived I was the leader. What a great day we had! Each top passed to seven quilters. Their personalities show in the sections they added.

Here's the top I took home.

CQFA Improv Round Robin 

My signature fabric, which I used on each top, was the green and yellow large moon print next to the orange feathers. I like the way everyone balanced additions to this quilt. The two red columns are especially strong and pleasing to me. My one regret is that I grabbed leftovers rather than pulling fabric. These small scraps are wonderful but each was already ruler cut the widths you see in the quilt. Very rectangular piecing rather than freehand cut. Live and learn.

Two weeks later the Book Study group met for our Round Robin. We stopped after the first round to take a quick photo of our beginnings. (Thanks for the reminder, M-N!) Clockwise from my Finnish flags in the bottom right: Tami, M-N, and MK.

MK shared results from a Floating Squares workshop she took with Sherri Lynn. It's a good read.

Bron gave me the lavender and cream print I used in the HSTs and as my signature fabric. You can see it best at the bottom of the last photo. The selvedge says it's a 1998 Nancy Crow design. How styles have changed!

First round of Book Study Round Robin

We completed six rounds which meant we worked on some tops twice. The results are below.

Finished Round Robins for me and MK

Finished Round Robins for Tami and M-N

Our next Ad Hoc Improv Quilters Linkup will be November 24. It's always the last Tuesday of each month. We hope you will join us with a link or simply come to read the fabulous posts from other improv quilters.

Enjoy the day, Ann


Tuesday, October 27, 2015

Chinese Coins Improv String Finished and AHIQ Linkup #2

I chose to square off the edges with a ruler, then quilted and bound the Chinese Coins improv string with a very soft pink solid. Light bindings attract me more these days.

Chinese Coins Improv String quilt

My first quilting idea was a combination of lines and circles like one of these sketches but Tami suggested a freehand diamond grid. Much more in keeping with the quilt. (Thanks, Tami!)

Quilting design sketches
Detail photos.

Chinese Coins improv string detail with red column

Chinese Coins improv string detail with crosscut column

Quilt Details
Size: 65"(H) x 57"(W)
Pattern: Improvisational Chinese Coins
Batting: Mountain Mist Cream Rose 100% cotton
Thread: Auriful 50/2 cotton threads in pink
Quilting: Walking foot


More information about creating this quilt on these posts:
1. Beginning Improv String Quilt
2. Improv String Quilt Pieced

Enjoy the day,
Ann

InLinkz removed because site was hacked.

Sunday, October 25, 2015

Propellers and Planes in the Fall 2015 Blogger's Quilt Festival

I've always wanted to make an airplane quilt - partly from memories of watching them with my grandfather and more recently because I have sons. When I saw some blocks made with the Steam Punk pattern, I knew it was time to start. I pulled all my vintage/special fabrics, bought more, and combined them into a personal memory quilt. Spurring me on... I desperately need a quilt large enough for our California king bed.

Propellers and Planes quilt

Upon completing a few blocks I loved the density of the fabrics when the blocks are set side by side without sashing.

Propeller quilt blocks
Collage 2 of Steam Punk quilt blocks

However, that layout would be a piecing nightmare with so many points to be matched and thick seams pointing the same direction. Additionally, I wanted more variation on such a large quilt. So I drafted some larger blocks and sawtooth sashing, combining them with groups of four small blocks.

For more fun, I drafted and improvisationally pieced a squadron of 30" planes for the back. I've never gotten a photo of the entire back but I snapped several partial views at our guild show.

A squadron of single prop planes flies across the quilt back.

When you make a quilt "just for you" it's always scary to send it out into the world. What will other people think? I've been honored that so many people have stopped to talk with me about the fabric combinations. There is something for almost everyone on it: bicycles, models, dogs, birds, fish and flowers, vintage and modern. Those novelty prints plus remnants from gifts made for family and friends make it my perfect memory quilt. I am blessed to sleep under it every night.

A selection of the fabrics in this quilt

Here is my last post about this quilt with links to many construction steps.

Quilt Details
Size: 118"(H) x 118"(W)
Pattern: Based on Steam Punk 
Batting: Pellon cotton
Thread: Auriful 50/2 cotton sewing threads
Quilting: Free motion quilting on a home machine

I'm entering it in the Large Quilt category of the Blogger's Festival at Amy's Creative Side. Take the time to look at all the wonderfully diverse quilts.

Enjoy the day, Ann