Tuesday, February 27, 2018

Scale Change and an Ohio Star Quilt: AHIQ 30

Reading Kaja's prompt reminded me of a scrap quilt I made years ago. The small shoofly and star squares were from a block exchange. Because we traded two blocks at once, most of the resulting quilts were very similar - an alternate set like the center of mine.

I didn't have many blocks, didn't want to make more but also wanted a queen-size quilt. As everyone knows I've always loved interesting borders. Setting the small blocks in a really large star was my solution. The navy points were too severely dark so I exchanged part of one point for a striking Japanese-style print. {I put the extra dark navy on the back of this quilt so historians would know this was a design choice rather than a lack of fabric. Just amusing myself.} I also wanted to extend the star to its points but, fortunately for me, it became too large. Chopping them off makes a much stronger design.

Shoofly Star quilt set in a large star

It still didn't look right. I recall folding and overlaying various fabrics thinking I'd change more points out when ribbons came to mind. Now this is where I ran out of fabric. There are several different reds. Then gold because a second ribbon of red didn't look right. And somehow I decided to play with transparency where the ribbons passed over darker and lighter sections and crossed each other.

Border of Shoofly Star quilt plays with transparency

This has always been one of my favorite quilts. I gave it to QS for Christmas that year {198? mumble} and sleep under it when visiting. It's a special treat to have quilts scattered across the country. I feel like a grandmother: I get special time with them but don't have to care for them. Audrey made good points about sharing quilts with others in a recent post. Funnily enough, QS didn't quilt back then but this gift inspired her to start. See; I still make my sisters do things. Ha. Tag! You're it, Sis!

Quilt Details
Size: about 90" square (?), fits a queen-size bed
Design: Shoofly and Ohio Star blocks, original border of enlarged Star
Batting: Mountain Mist Blue Ribbon 100% cotton
Thread: cotton, gold metallic, and YLI nylon monofilament
Quilting: Walking foot, free-motion

Enjoy the day, Ann

InLinkz removed because it was hacked.
Saturday, February 24, 2018

Bars 2 Quilt

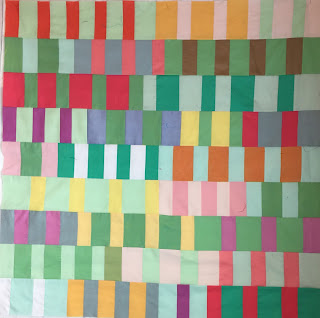
My stack of baby quilts finally ran out at year's end. Good news that they all found homes but more will be needed soon. Plus, having reserves was one of my smarter moves. I decided to replenish the stack by using extras/leftovers from larger projects. {Yes, I have a bunch of Chinese Coin tops, too, that I'm holding on to in case I'm asked to demonstrate them again.} So here's the first baby quilt for the TBD pile.  These light sections came from the Bars workshop so this is Bars 2.

Since I didn't start numbering my quilts in the beginning, I've decided to number them within series. It's so much easier to name these quilts sequentially rather than coming up with original names. {I've never been good at that.} Frankly, many of my quilts begin with a traditional block idea.

Pastel bar sections for a baby quilt

As you can see, the photo above was taken at night so the lighting is off. It's another one taken before I got wrapped up in making class samples for the Chinese Coin demo. Some more sets with white are waiting to become the Bars 3 baby quilt but I don't have a photo of them yet.

Once the sections are sewn, they easily move around until the final arrangement takes form. The simplicity and speed of construction are advantages of small quilts that I must remember.

Bars  2 quilt top

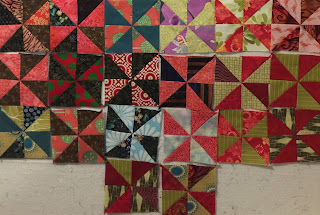
Pinwheels have been my leader/ender project since the end of the year. Wow, these fabrics are dark. They were made from squarish remnants. I'm not sure why I didn't cut them into Coins but found this a nice change. No idea what they will become but again, it's good to have a small stash ready for an occasion.

Leader/Ender project 

Tuesday will be the next AHIQ linkup. Kaja invited us to work on scale changes but we're interested in all utility or improvisational work. I'm wrapped up in family issues but found something to share. What about you? Please join in; your posts are my late night relaxation for now and serious food for thought when we are scared to make a leap into creativity.

Enjoy the day, Ann

Tuesday, February 20, 2018

Circular Anomaly Fused

There's not a lot of time right now and I don't feel very creative or original but several workshop projects are sitting around. So I can continue to push these partially finished tops and UFOs along. For example, fusible interfacing was ironed to all the second layer pieces of Circular Anomaly as each was pinned in place. They should be fused before pieces get lost or start fraying. Here's a late-night photo I took in December but never posted.

Circular Anomaly layout

I started fusing that layer in the top right. Although the ironing time spread over several days, it only took 2-3 hours to arrange and press that quarter. And fortunately I took breaks because there seem to be too few red circles.

What about this instead? I switched out about ten kisses although some are partial (on the border.)

Circular Anomaly fused

I'd use more circles in the top left but I want to highlight that rose. Remember? And in middle on the left is a wonderful scrap of blue circles that screams for kisses around it. Those are my limiting features.

Next step is topstitching all those hugs and kisses. Since this might be a lap or toddler quilt, satin stitch will not be a choice but I am considering blanket stitch. I don't have the energy for creative thinking or the time to try different stitches right now but this will be a good one to work on in a couple of months.

Enjoy the day, Ann

Saturday, February 17, 2018

CCVII Quilted

Chinese Coins VII was quilted and bound for the "demonstration that didn't happened." Both it and CCVI illustrated my topics well so I think I'll keep them until I can finally give that class.

Chinese Coins VII quilt

Both have simple walking foot lines across the coins: soft yellow thread on CCVI and light green on CCVII. After SID with cotton thread in the bobbin and nylon mono-filament in the top, I stitched about 3/8" on each side of those seams with cotton top and bottom. Why 3/8"? That's the width of my walking foot and I used it to track the seam line. Then I halved the columns and halved twice more until the density looked right. I like the slight variations that occur when the columns are different widths. In fact, in the photo below there's still another set of lines to be quilted in the narrowest green column.

Walking foot parallel lines in progress

Stripes make great bindings. For once I did what I always intend: I purchased three yards of the yellow and green stripe.  I don't use much yellow so I'll add it as the binding for several of these quilts. {Making hay while the sun shines.}

Chinese Coins VII quilt with
green and yellow striped binding

An older print of large yellow and orange roses on a green background made most of the back with the last of the yellow and green conversation bubble print (about an eighth yard WOF) added to get the right length.


Quilt Details
Size: 40" x 42"
Design: Chinese Coins
Batting: Mountain Mist Blue Ribbon 100% cotton
Thread: light green Aurifil cotton 50/2 thread, YLI nylon monofilament
Quilting: walking foot parallel lines


Enjoy the day, Ann

Tuesday, February 13, 2018

CCVI (Yellow and White) Quilted

Chinese Coins VI (the yellow and white one) worked out better than I thought. Three different column widths are symmetrically placed. The Coins and columns are rotary cut although I didn't try to keep the coins parallel.

Such a low volume quilt needed some solid white fabric to emphasize the lightness of the "white" columns. I.e., ensure everyone realizes they are not beige. I'm finding that adding some solid white to areas I want to read as white is better than using all prints.

Chinese Coins VI quilt

As I've mentioned before I like to ditch stitch major seam lines and on Coins I like to add rows of stitching about 3/8" to 1/2" on each side of the ditch. Here I mimicked that design down the centers of the yellows and the wider (outside) white columns. Then I sewed my usual: quilt by splitting the distance in half until it looked right to me. Because the center yellow column is wider, those quilting lines are spaced further apart than the other yellow columns. I considered quilting as many divisions on the two narrow white columns but decided that was too tight.

Parallel quilting can seem stiff until the quilt is washed. Then is softens up beautifully.

Chinese Coins VI quilting detail

There was a lovely yellow and white stripe in my stash waiting to become binding. Even better, it had these unique bulleyes. Now I see I should have fussy cut the binding so theys lined up around the binding. A note to remember for next time.

Chinese Coins VI binding detail

The buffalo plaid/gingham on the back makes me quite happy. It has a slightly roughened texture - almost like kitchen toweling or hopsack - although it doesn't snag. Usually I like soft finishes but this texture certainly offers comfort on a cold day. We've been having lots of cold days in Texas lately. I'll have to remember this backing choice in the future.

Quilt Details
Size: 45" x 52"
Design: Chinese Coins
Batting: Mountain Mist Blue Ribbon 100% cotton
Thread: yellow Aurifil cotton 50/2 thread, YLI nylon monofilament
Quilting: walking foot parallel lines

Enjoy the day, Ann

Saturday, February 10, 2018

Another Attempt to Use the Strips

The previous quilt top for my Chinese Coin demonstration sorted the columns by color regardless of value so I thought it would be helpful to sort this one by value, regardless of color. The plan was to have 1) very light value yellow and white columns, 2) medium to light value green and blue columns, and 3) dark value green and blue columns.

First step was to sew all the mediums. I was determined to finish these off so you can see I ran out of  a coins in the middle. I could cut more strips or sew two narrower columns together to get the wider column.

Chinese Coin quilt with
double column bottom middle

Another idea is to add in a strip of contrast. And move the green column to the far right.

Using a sashing strip to fill
a short column section on Chinese Coin quilt

I thought it still needed the light and dark value columns until I realized this is a great background to applique on. Hmm. Change of plans. I've been wanting to add applique to a Coin quilt. This will be Chinese Coins VIII...

Enjoy the day, Ann

Tuesday, February 6, 2018

Family

An unexpected family emergency. The demo must be postponed.
Some posts are queued up but I won’t be checking much.
Best wishes to you all. Hug your loved ones.

Enjoy the day, Ann

Saturday, February 3, 2018

What About the Green?

Since the green coins weren't used in the previous quilt, I have loads of them on hand but almost no white strips and relatively few yellow coins left. While I can certainly sew two green columns together, I want to show a three-color quilt at the demonstration.

Yellow and green columns in progress for Chinese Coins

So I added a row of blue coins...

Adding a blue coin column
to the Chinese Coin quilt

and sewed a quick top.

Chinese Coins VII quilt top

Chinese Coins VII duplicates CCVI but covers all my bases -  mixing prints, adding a strip square, changing column widths, ruler cutting the sides, and using three colors. Having both at the demonstration should highlight all these points.

I never realized how hard teachers work to prep a class.

Enjoy the day, Ann