Tuesday, November 3, 2015

Two Improv Round Robins

It's certainly been a busy month with a couple of trips, visiting friends, several quilt meetings, and the PIQF show. Most of my quilting time was spent on the Lobster Boat quilt for my grandson-to-be.

CQFA (California Quilt and Fiber Artists) is a smaller group that takes turns leading workshops. Round Robin from Improv Handbook for Modern Quilters was suggested.  Because I'd previously taken this workshop from Sherri Lynn, when the day arrived I was the leader. What a great day we had! Each top passed to seven quilters. Their personalities show in the sections they added.

Here's the top I took home.

CQFA Improv Round Robin 

My signature fabric, which I used on each top, was the green and yellow large moon print next to the orange feathers. I like the way everyone balanced additions to this quilt. The two red columns are especially strong and pleasing to me. My one regret is that I grabbed leftovers rather than pulling fabric. These small scraps are wonderful but each was already ruler cut the widths you see in the quilt. Very rectangular piecing rather than freehand cut. Live and learn.

Two weeks later the Book Study group met for our Round Robin. We stopped after the first round to take a quick photo of our beginnings. (Thanks for the reminder, M-N!) Clockwise from my Finnish flags in the bottom right: Tami, M-N, and MK.

MK shared results from a Floating Squares workshop she took with Sherri Lynn. It's a good read.

Bron gave me the lavender and cream print I used in the HSTs and as my signature fabric. You can see it best at the bottom of the last photo. The selvedge says it's a 1998 Nancy Crow design. How styles have changed!

First round of Book Study Round Robin

We completed six rounds which meant we worked on some tops twice. The results are below.

Finished Round Robins for me and MK

Finished Round Robins for Tami and M-N

Our next Ad Hoc Improv Quilters Linkup will be November 24. It's always the last Tuesday of each month. We hope you will join us with a link or simply come to read the fabulous posts from other improv quilters.

Enjoy the day, Ann

Tuesday, October 27, 2015

Chinese Coins Improv String Finished and AHIQ Linkup #2

I chose to square off the edges with a ruler, then quilted and bound the Chinese Coins improv string with a very soft pink solid. Light bindings attract me more these days.

Chinese Coins Improv String quilt

My first quilting idea was a combination of lines and circles like one of these sketches but Tami suggested a freehand diamond grid. Much more in keeping with the quilt. (Thanks, Tami!)

Quilting design sketches
Detail photos.

Chinese Coins improv string detail with red column

Chinese Coins improv string detail with crosscut column

Quilt Details
Size: 65"(H) x 57"(W)
Pattern: Improvisational Chinese Coins
Batting: Mountain Mist Cream Rose 100% cotton
Thread: Auriful 50/2 cotton threads in pink
Quilting: Walking foot


More information about creating this quilt on these posts:
1. Beginning Improv String Quilt
2. Improv String Quilt Pieced

Enjoy the day,
Ann

InLinkz removed because site was hacked.

Sunday, October 25, 2015

Propellers and Planes in the Fall 2015 Blogger's Quilt Festival

I've always wanted to make an airplane quilt - partly from memories of watching them with my grandfather and more recently because I have sons. When I saw some blocks made with the Steam Punk pattern, I knew it was time to start. I pulled all my vintage/special fabrics, bought more, and combined them into a personal memory quilt. Spurring me on... I desperately need a quilt large enough for our California king bed.

Propellers and Planes quilt

Upon completing a few blocks I loved the density of the fabrics when the blocks are set side by side without sashing.

Propeller quilt blocks
Collage 2 of Steam Punk quilt blocks

However, that layout would be a piecing nightmare with so many points to be matched and thick seams pointing the same direction. Additionally, I wanted more variation on such a large quilt. So I drafted some larger blocks and sawtooth sashing, combining them with groups of four small blocks.

For more fun, I drafted and improvisationally pieced a squadron of 30" planes for the back. I've never gotten a photo of the entire back but I snapped several partial views at our guild show.

A squadron of single prop planes flies across the quilt back.

When you make a quilt "just for you" it's always scary to send it out into the world. What will other people think? I've been honored that so many people have stopped to talk with me about the fabric combinations. There is something for almost everyone on it: bicycles, models, dogs, birds, fish and flowers, vintage and modern. Those novelty prints plus remnants from gifts made for family and friends make it my perfect memory quilt. I am blessed to sleep under it every night.

A selection of the fabrics in this quilt

Here is my last post about this quilt with links to many construction steps.

Quilt Details
Size: 118"(H) x 118"(W)
Pattern: Based on Steam Punk 
Batting: Pellon cotton
Thread: Auriful 50/2 cotton sewing threads
Quilting: Free motion quilting on a home machine

I'm entering it in the Large Quilt category of the Blogger's Festival at Amy's Creative Side. Take the time to look at all the wonderfully diverse quilts.

Enjoy the day, Ann

Thursday, October 22, 2015

Lobster Boat Quilt for a Special Person

Guess who's going to be a grandmother?

Lobster Boat quilt

How happy am I? VERY!

No names announced yet so we are calling him Little Tex.

Surely such avid sailors would want a sailboat quilt. Wrong-o. She Who Wore White wants a lobster boat. Fortunately she sent several photos. I got busy sketching different ideas. When finalized, templates are drafted by overlaying tissue paper. Sometimes I draft in reverse; other times I turn the tracing paper over after drawing because the freezer paper templates are always the opposite direction.

Lobster boat sketches and pattern.

Do you see those small cities of houses in the sketches? Thank goodness I came to my senses before piecing. The bottom two photos show the templates. I kept the gentle curve along the top of the hull because it will be easy to piece. But I did add a very small triangle on the front of the boat to make a pseudo-curve. It could have been been drawn as a curve, too.

Next I pulled fabrics that might work. Way more than I finally used but it all came from my stash.

Fabric possibilities for the lobster boat quilt

Fairly confident in my choices for the ocean and the boat's hull, I pieced those sections first. The bold red and white striped fabric adds emphasis (several boats had a band of color on the hull) but I especially liked the way the yellow and text fabric creates boards.

The lighter blue and white print and the dotted blue mimic reflections of the boat on water. Originally I planned to piece the lobster buoy from several small pieces. Then I found a Balinese wax print that worked excellently - a yellow teardrop on dark blue.

Piecing the lobster boat quilt

The blue fabrics get lighter with distance. Careful template placement on the blue and white stripe makes perfect shorelines and sandbars. How lucky is that? That's (my version of) the Brewster Island lighthouse in the distance.

Piecing the center of the lobster boat quilt

Throughout construction I was dreaming up more ways to personalize this quilt. So the trio of houses in the foreground are the school colors of parents and uncles. (In fact, that same yellow is in the Tiger Stripes Rail Fence.) To ensure no one else could claim them, each is labeled with the respective name in Metler Poly Sheen neon yellow or orange. More about writing in this post. None of these colors showed up well on the yellow house so I used dark purple cotton thread on it. Then I christened the boat with the grand-dog's name and added a Texas flag because he would always fly it.

Details of the lobster boat quilt

There were sailboats, fish, and lobster prints begging to be used but they never worked in the body of this quilt. I worked them into the border.

I intended to improvisationally piece the back from the scraps (honest) but these fabrics dropped next to each other. Now he will always be wrapped in the loving arms of Texas... and me.

Texas flag on the back of the Lobster Boat quilt.

Those directions for five-pointed stars came in handy again.

Lots of free motion quilting: still water, waves, stone houses, windshield, boards, and more. Even with all that quilting, it's still soft and cuddly once it was washed.

Quilting details from the back of the Lobster Boat quilt.

Quilt Details
Size: 50"(H) x 51"(W)
Pattern: Original design
Batting: Mountain Mist Cream Rose 100% cotton
Thread: Metler and Auriful 50/2 cotton sewing threads, Metler Poly Sheen
Quilting: Free motion quilting


The next Ad Hoc Improv Quilters Linkup begins the Tuesday, October 27.

Enjoy the day, Ann

Friday, October 16, 2015

Selvedge String Quilt Resewn

The Selvedge String quilt is back together. Although most people won't notice any difference, I like it better.
Selvedge String quilt, resewn final seam

Here's what it looked like the first time. The lighting is better in this photo but the long selvedge from side to side bothered me. That's what I removed.

Selvedge String quilt, before resewing.

Because I added fillers, there are still places where they point in opposite directions when they meet, but it no longer feels like opening a book.

Selvedge String quilt, detail of final seam
Border next.

Enjoy the day, Ann

Saturday, October 10, 2015

Selvedge Quilt Continues

I made twenty Brock House units before putting them together. My only requirements for sewing two units together were equal lengths and that they not have the same center solid. Sometimes they matched almost perfectly in length and curvature.

Two selvedge blocks ready to sew together.
Same length and curvature.

Others just needed a trim.
Two selvedge blocks.
On the left: same length, need trimming.
On the right: trimmed.

It got a bit harder after that. The well-behaved pairs matched each other again although the length might be off. In the set below, I added another string to the top right side to get them to match.
Left photo: the top right section bows in.  
Right photo: yellow string added to equalize the lengths.

Other times, they curved away from each other. Fixing that was a choice between adding some strings or trimming the curves. When trimming, I overlaid the two units and cut between them so they would lay flat after sewing. There's a more detailed explanation in this post.

I sewed two sets of four and two sets of six then sewed those together. Again I added a selvedge or trimmed as seemed best.

Things went very well until the last seam. Here's a mistake. I added long selvedge strips to both sides rather than trimming one side.  The selvedges point in opposite directions so even with a variety of selvedge strings this seam is more visible.

On the design wall it was obvious a long selvedge joined every large section together. If I had trimmed both sides, the vertical and horizontal rectangles would have butted against each other in a more natural fashion and better disguised this seam. I may take these out and redo them...

Brock House Selvedge quilt center

Here's a detail of the final seam.

Final seam detail.
All the selvedges point in opposite directions.

Did you notice that the solid selvedges are included in these strings? I was afraid the quilt would be too bland. The solids had really long fringe on the edges, so I sewed them about an eighth-inch inside the woven area. Perhaps you can see it in the photo below. I used white thread for all this sewing since many of the selvedges have a white edge.

As luck would have it, two solids formed a T which you can see in the photo on the left. Like an itch you can't scratch, it bothered me until I inserted a second string to separate them.
Selvedge quilt detail:  before and after
inserting a second string between two solid strings.

One of the best effects of blogging is that it forces me to slow down. Stopping to look at the photos helps me see problems that aren't as apparent while I'm sewing. Perhaps they aren't a mistake to anyone else but it's better to decide now if it will continue to bother me. And what am I going to do when I finish this quilt? Start another. Might as well get this one to my satisfaction.

Previous posts Improvising a Traditional Block and Selvedge Race quilt.

Enjoy the day, Ann

Wednesday, October 7, 2015

AHIQ #1 Wrap up

What a week! Kaja and I both feel Ad Hoc Improv Quilters started off with some wonderful links. So many different ways to improv a quilt. People shared their ideas so generously. Looking at all the comments and posts, two common themes thread through the posts.

  • Although improvisational quilting is more demanding than originally thought, most find the process freeing and fun. Hooray for a positive!
  • Many worry whether their work is "real" improv, whether it resembles other improv quilts. Boo for a negative anxiety.
Kaja posted about emotions. I'm going to attempt to work through the anxieties.

Her dictionary definition "to create or perform spontaneously and without preparation" and "to produce or make something from whatever is available." Neither of these says anything about style, commercial success, or approval by anyone including the worst critic of all - our inner negative voice. Improvisational quilting is a way to practice, and hopefully master, our own artistic visions. It's also a way to use fabric we already have on hand. Both are admirable and sufficient to the definitions.

There are no references specifying use of rulers or not, use of rotary tools or scissors, use of new, recycled, printed, or dyed fabric. Gwen Marston and Sujata Shah seem to prefer to cut freely at first before they straighten their units with rulers. Rayna Gilman and Sherri Lynn Wood usually avoid rulers. Rayna also over-dyes and prints her fabrics. All are improvisational quilters. While we certainly admire their work and find ideas there, it's a mistake to constantly compare our work with others. Amy at Amy's Free Motion Quilting Adventures said it best: "Comparison is the thief of joy."

By 1998 Nancy Crow was so tired of her rigid, template-driven style she almost quit quilting. The quilts of Anna Williams revitalized her, encouraging her to move in a completely new direction - improvisational, without drafted designs, rulers or templates. Anna was the first guest artist at the1990 Quilt/Surface Design Symposium. Nancy is an internationally known quilter. Who influenced her? A vernacular artist - Anna Williams.

Anna hailed from Louisiana, not Alabama. Most of her quilts were made of many small pieces rather than the large pieces more common to early Gee's Bend work. Why? Katherine Watts gave fabric to Anna when she closed her shop. Anna had a rich resource of quilting fabric unavailable to the others.

The women of Gee's Bend originally quilted "britches quilts", the name they gave to utility quilts made from worn out clothing. Later some got factory scraps, the leftovers from mills. At one time, they used Sears corduroy. As their economic situations improved, they eventually purchased fabric off the bolt. This progression is visible in their quilts.  My first point is that they chose what to use from what was available to them. My second point is that they were internally compelled to create artful quilts to the best of their abilities. Just like Anna; just like us.

This reminded me of Kathleen McCrady of Austin, Texas - an accomplished, award-winning quilter. Here's what I recall from a lecture she gave in Dallas years ago. Her parents were Oklahoma farmers; they had land instead of cash. With a small grant from the Quilter's Guild of Dallas, Kathleen documented her family quilts before they were completely lost to history. She related the sequence of fabric use: sew a dress; when worn out, make an apron; when that wore out, make a quilt. It was very apparent from the photos that these were utility quilts whose primary purpose was keeping the family warm. Large rectangles of dress fabric, faded and slightly dingy from years of wiping hands on those aprons combined with occasional work pants. Many were stuffed with corn husks. Finally she showed a 1950 bright pink and green quilt, the first her family made with fabric purchased expressly for a quilt.

Britches quilts, work clothes quilts, utility quilts. These women never called their quilts improvisational, although we classify them such. Perhaps we should call our work Modern Utility.

Many of these women knew each other or they knew other quilters working in this style. They borrowed designs from each other. And they had fun making something needful. When the press of needfulness abated, they made quilts for the sheer joy of the process. How about you? Are You Havin' Any Fun?

Enjoy the day, Ann

Saturday, October 3, 2015

Improvising a Traditional Block

I'm still thinking about the selvedge string sheet (Selvedge Race); however, there are more selvedges on the loose. So I started the Race again. After two repeats it was almost wide enough; I added one more selvedge to make a narrow sheet only five strips wide. The width ranges from four to six inches since the selvedges were not cut a consistent width.

Brock House is a traditional block documented in The Quilter's Album of Patchwork Patterns by Jinny Beyer.

Brock House and variations for selvedge strings.

In some ways it reminds me of Sherri's Floating Squares: two small squares sewn together then joined to a larger square. When I simplified further (bottom left in the photo above) that iteration reminded me of Flying Squares, a quilt I made years ago using the bottom right block.

Flying Squares quilt

Brief directions for Flying Squares can be found here. These block designs all use partial seams. It's a very useful technique; not hard at all. Jinny Beyer wrote directions for partial seaming here and Laura Nownes (co-author of Quilts, Quilts, Quilts) created a YouTube video here.

I decided to try this with the skinny Selvedge Race. The selvedges are so busy that they seem to need solids. Here is what's on hand.

The solids in my stash.

Finding a 4.5" orange remnant in my scrap bag from the back of this quilt, I freehand cut all the solids into squares about that size although a larger center square might look better. (Using what I have.)

Selvedge string Brock House variation

In the photo above, I sewed a partial seam on the top left rectangle. Then sewed the bottom left rectangle all the way across, pinned the bottom right rectangle (ready to sew.) The top right rectangle is pinned on the solid only to ensure it's aligned with enough seam allowances everywhere.

I make a couple of stitches in place then tie the threads of the partial seams on the back of the block. Most people probably wouldn't bother but I hate the idea of threads coming loose.

Tying threads from partial seams on the back.

Is this improv? Depends who you ask. I think of these as units. They are similarly sized but not identical. Joining strips will probably be needed to fit them all together. In some ways they may look like Kaja's Wall units - after all, they are smaller, square-ish shapes. In other ways they may look like Flying Squares... or something else entirely.

I am reminded of Anna Williams, an exceptionally talented Louisianan who found more time for quilting later in life. In her eponymous book, Nancy Crow wrote, " (Anna) built her quilt tops from parts and pieces, sewing smaller shapes together, then adding more shapes to make larger units. Her crowded bedroom housed stacks of small units, stacks of medium units, stacks of large units..."(p. 17) So there is a legacy of sewing units first, then using/reusing them as single pieces to build a quilt. [And, no. This quilt will be nowhere near as artistic as Anna's. But the IDEA of simply making units resonates.]

 Two down. Now I'm cutting the rest of the narrow string sheet into rectangles.

The AHIQ Link-up is still open for a couple of days if you want to join in by linking up or just perusing the posts.

Enjoy the day, Ann

Tuesday, September 29, 2015

Selvedge String Race Quilt and First AHIQ Link Up

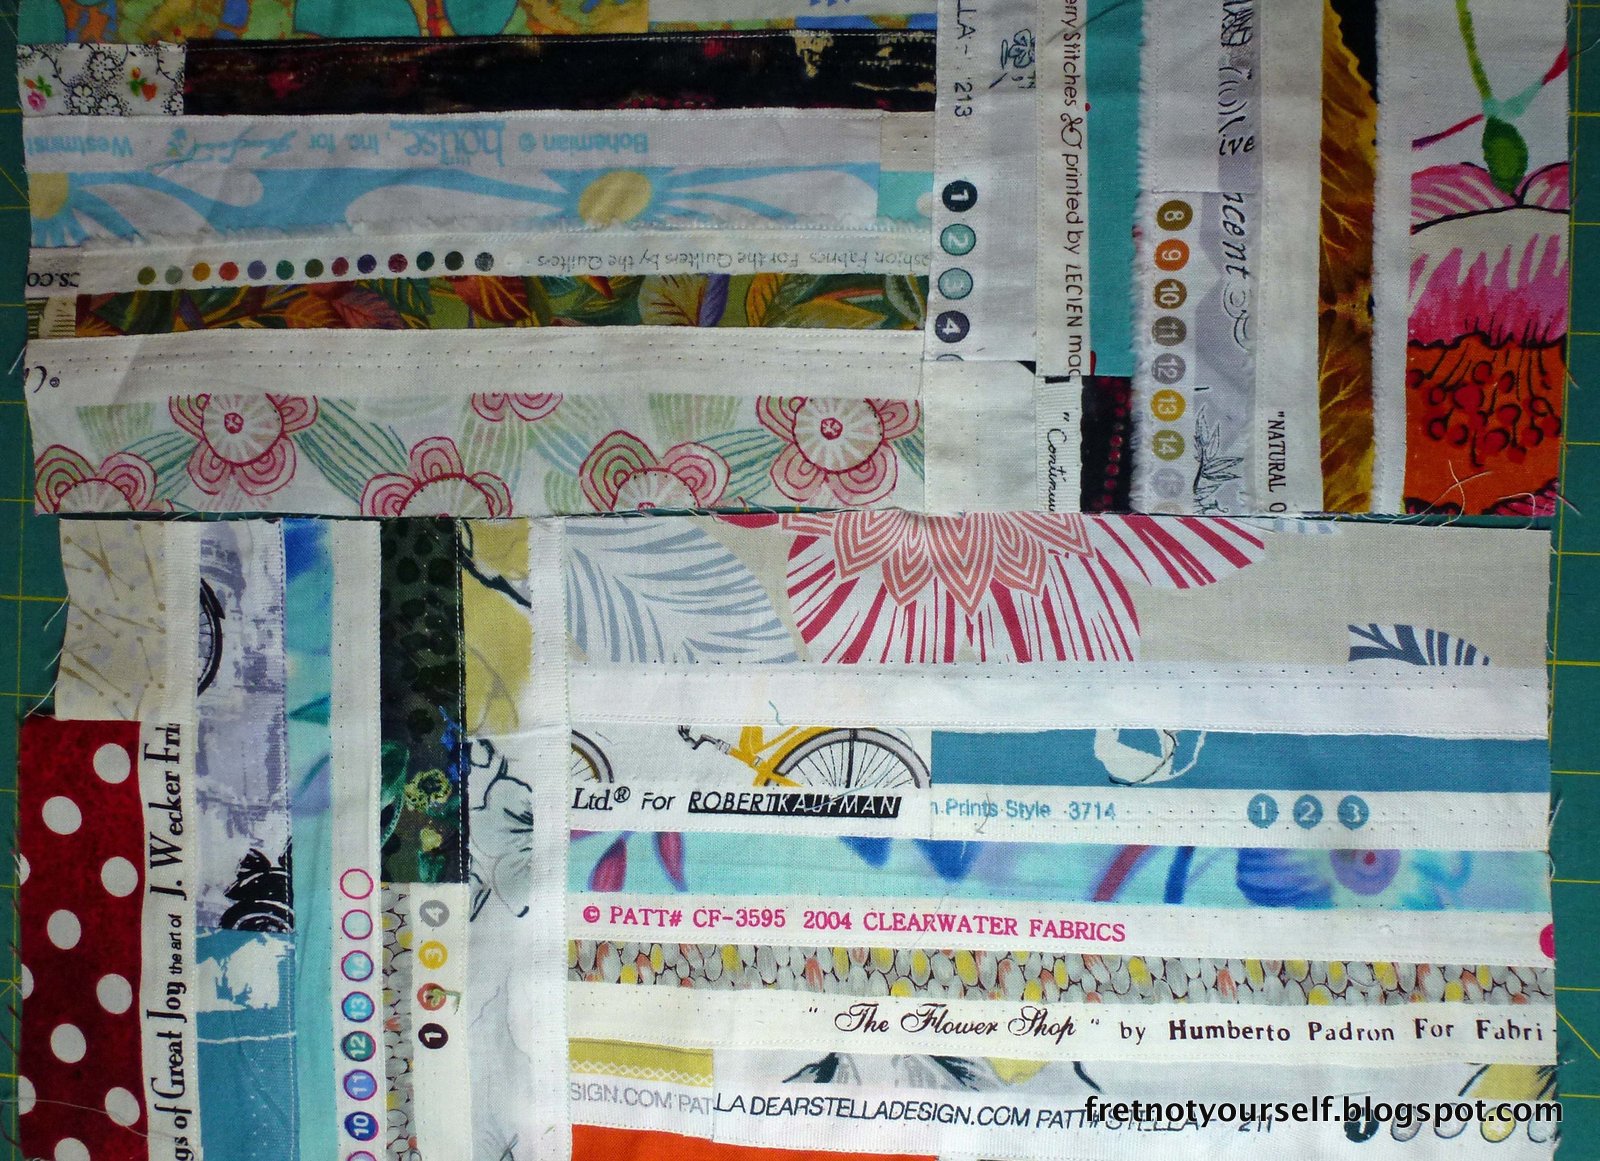
This is why I keep my fabric in clear containers. When I decided to save selvedges, the only empty spot was a small drawer. Stuff kept going in; nothing came out; it was easy to forget. But now that it's come to light, I simply have to "make it or move it." My improv book study chose to work on strings again this past month. I have several ideas but these selvedges are screaming for attention. So I'm combining the two projects.

Selvedges stashed in a drawer are finally brought
 to light when the drawer no longer closes.

Problems:
  1. Huge variety of lengths. Some selvedges are one-eighth yard while others are three yards.
  2. I saved both sides of the fabric. One has printed information while the other may not have any white at all.
  3. Some selvedges are bound-edge while others are fringe-edge.
  4. I don't want to use a foundation. (The Hotter'n Hell Hundred helps explain my disinterest in thick quilts. No. I have not raced, but I have lived through these summers.) 
Racing reminded me. My sister made a Jelly Roll Race quilt at her guild retreat last year. I've never made one and don't buy jelly rolls but the fabric shape seemed similar enough. Sew long strips end to end making a very loooong strip. The ends are brought to the top so two sides can be sewn together to the fold. Cut and repeat until your quilt reaches the length/width combination you want.

Starting on the woven edge, I backstitched to keep it from unravelling when I cut the thread close then sewed off the cut side.

A new problem arose. Because the selvedges can only be sewn one way, that loooong strip has to be cut in half before sewing two strips on the side. That's manageable although the strip is as long as Rapunzel's hair.

I tried to pair both selvedges from each fabric but otherwise just used them as they came. Random selection. They range in width from a scant half-inch to three inches. Greater consistency would be better if I cut selvedges again - perhaps one-inch past the printed section or 1.5 inches total.

Here's what it looks like with the first two strips sewn.

Selvedges sewed end to end.
Then overlapped and sewed together.

The improv book study met the next day and I had only completed one more repetition. Mine is on the left in an accordion fold (Ten folds actually.) Look at the delicious results from everyone. Clockwise from mine, Tami alternated glorious golds with skinny navy strips. MN organized her strips into color groups and crosscut each with an X. She's almost finished binding this delightful small quilt. ML created wonderful mockups of different ideas using digital color photos. (She keeps them in a binder. I need to adopt this idea.) Now she's creating a table runner with large triangles of strips.

A second month of String tops 
from the Improv Book Study

I kept working that evening. Here it is after four rounds of cutting and sewing. Wow, a string sheet. The Race is on!

Use selvedge strings to create fabric.
Selvedge Race string sheet.

The sheet curves to the right rather than straight. I need to think some more.

It's time for our first Ad-Hoc Improv Quilt Link-up. Improv has so many different meanings. Although Kaja and I have written several posts recently, we are on tenterhooks to read your ideas and see how you've been working.

Enjoy the day, Ann

InLinkz removed because site was hacked.

Saturday, September 19, 2015

It's Even Better to Finish Quilts for Young Friends

Two easy finishes! Both the t-shirt quilts are done and gifted.

Colorful t-shirt quilt sashed with baseball prints. Wide green border, striped binding.
Baseball t-shirt quilt

Because each shirt was cut to the size of the printing on it, there were some "shortages" when it came time to sew them together. Those areas were filled with t-shirt tails. The green square printed 2006-2007 in the quilt below was short on two sides. Those two tails are very successful {in my opinion.}

T-shirts sashed in black and white fabrics.
Black and white t-shirt quilt

A meandering pattern was the easiest way to avoid the "rubbery" parts of the t-shirts. (Poking needle holes in the rubber just makes it peel off.)

Baseball t-shirt quilt detail

Even the bindings came from stash. {Keep that fabric moving, is my motto.} The lengthwise stripe on the baseball quilt was very easy; just cut WOFs. The zigzag ran WOF so I cut binding lengthwise on a half-yard. Many joinings. Barely enough to bind the quilt. But worth it to me.

Striped binding on two t-shirt quilts

However, the level of my stash has not been noticeably reduced. Doggone it.

Enjoy the day,
Ann

Saturday, September 12, 2015

It's Good to Have Young Friends: Thoughts on Improv Quilts and Over Dyeing

We have two darling young neighbors in Houston. Guess what they wanted? Yes, t-shirt quilts. All the shirts are interfaced and cut using a ruler. They belong to someone else so I'm trying to be careful. But I plan to piece them improvisationally using only my stash.

In the past, I cut or sewed the shirts to a uniform size, sashed them, and created a grid. This time each was cut to the size of the printed design, then arranged randomly. I'm  estimating the space between two shirts, cutting strips of fabric about three-fourths that width, then sewing them to a t-shirt. The widths range from two to four inches. Some will be cut down further to fit together but I want room to maneuver since there's no pattern.

Baseball t-shirt in progress.
Each shirt will be sashed a different width.

One neighbor plays baseball. The other favors black. I've pulled every bit of fabric that meets either of those requirements and there is plenty to make the quilts.

Original layout for the future black and white t-shirt quilt.

It occurs to me this is roughly similar to Kaja's simple shape - I'm using a square like she did. (Of course, the t-shirts are a coloring book compared to her sophisticated masterpiece.) Mine are large; the printed designs are the centerpiece. Hers are much smaller; she created her squares from two smaller pieces. You could use large scale prints or novelty fabrics to create squares.

You could also improvise using old workshop samples and leftover blocks. (Dip your toe into the water before you jump in.) Lay them out, sash around them, and trim to fit pairs together. Don't worry if the fabrics of your blocks don't match. Years ago a speaker at our guild did something similar. I can't recall her or her name, just the memory of this quilt. She used all her old class samples and orphan blocks. Nothing matched until she over dyed with a tan. Voila! It all blended together; everything was suddenly "reproduction."

Chawne who blogs at Cauchy Complete has been over dyeing her quilts with indigo. It's a much more modern look. The link points to one post but she has made several this way. Be sure to look around her blog.

If neither of those colors suit, what about cheddar yellow? [Americans use annatto seeds to color cheese a bright orange. I always thought it was another crazy-yankee idea but this National Public Radio article places blame for the practice back on the British. Could it be true?]

Now I'm really on a roll. Take a look at Lynn's Scrap Vortex. She incorporated orphan blocks with her scraps to make a very creative improv quilt. No overdyeing needed here.

Kaja and I have gotten several messages from people planning to join us. If you are still on the sidelines, jump right in. We all have different styles; when you share, there will be even more methods.

"Do what you can, where you are, with what you have." 
Theodore Roosevelt, 26th U.S. President

Enjoy the day, Ann

Saturday, September 5, 2015

Another String Improv Quilt: Rail Fence

You probably realized there were {a few} extra string sheets from my previous quilt. Actually, there were enough to make an even larger quilt. Fortunately, that first one sparked several ideas for future quilts. String 1 reminds me of Chinese Coins with long bands of similar colors and all stripes pointing in the same direction. I want the stripes to point in both directions in String 2. What's an easy way to do that? Rail Fence.

Improvisational Rail Fence quilt

Although it's one of the most common string quilt designs, I'm sure recent examples nudged my consciousness. Sujata Shah has a delightful quilt along of her version of this pattern. I made one as a graduation present for my youngest.  Earlier this summer I saw Drew Steinbrecher's Line Study #4. Wow! Gloriously clear colors with stripes pointing in both directions... like a rail fence. Bill Volckening shows a rail fence from 1975 on this post. Plummer Pettway of Gee's Bend created this version she called Crazy Quilt documented by Auburn University. It's frequently listed as Roman Stripe but looks like rail fence to me.

First, I laid out most of the leftovers to get an idea of size. Sherri suggests this in her book, IHMQ, as a great way to determine approximate amounts of fabric. Many of these are already cut into pseudo-squares but some are still long sheets.

Leftovers from Improv String 1

Then I moved some sections. Basically a rail fence at this point. I want to experiment by varying block sizes more.

Beginning String 2

As usual, I started sewing sections together in rows from the top left. Wrong move. The quilt becomes columns. That worked for the previous quilt but not this time. Section lines can be hidden by building up several distinct areas. Sherri (Daintytime) mentions this in the Floating Squares score as does Amanda (Crazy Mom Quilts) in Scrap Vortex. So I went back and put some smaller pieces together, building larger and larger sections. Sometimes two small blocks join to one larger block.

The colors were becoming mushy as the section sizes increased. A lavender-and-white-stripe home decor fabric and three darker blues from the discarded set increased the value range. Some strata are too long; I plan to cut them. Others, I left whole. To mask long fillers, Sherri suggests strips pieced from multiple fabrics (IHMQ, p. 29.) Amanda uses a similar method to equalize larger blocks. Pre-sewing a few pieced, skinny, filler strips might keep me from adding overly long pieces. {Didn't I say that last time?} Where to find some...

Adding lavender and white stripe

The paper pieced remnant below was my first attempt at an inner border on the watermelon string quilt. It didn't work there and it doesn't work any better here. Oddly enough, the only place it has fit is the Round Robin quilt - cut into three parts.

Leftover paper piecing as a possible filler strip

Another dive into the scrap bag brought some string-pieced triangular crumbs. I made them a few months ago, thought they were ugly and tossed them in the bag. Not only do they fit here, they also are those pieced, skinny, filler strips needed to join larger sections.

Reworking the layout; adding pieced triangles

The final scrap of a sawtooth border print only works because of the other triangles and the added blues. It's on the right. Do you see it?

Sewing sections together

I love, love, love different stripes. Especially red. Some of my striped fabrics are printed along the warp, others along the weft. In both cases, I cut across the fabric width (weft-wise as it were.) It might have been better to cut across the stripe whichever way it fell. Something to consider.

Kaja's post this week suggests starting an improv quilt with a single shape. What are your fabrics suggesting to you?

Enjoy the day, Ann

Wednesday, September 2, 2015

Ah, AHIQ Begins


After a good six months of conversation and planning Kaja posted our preamble to improvisational quilting. Yesterday she started the ball rolling with our first AHIQ post. Be sure to check it out.
Ad Hoc Improv Quilters
Initially I was surprised at the broad interest for an online improv group. So many quilters have expressed a desire to join us. Then I realized we are drawn to improvisation in the same way we were drawn to quiltmaking. We need to express ourselves (or find our voices.) We want to be joyful in our work rather than worry about meeting external standards of precision, design, color, or fabric. We want an original rather than a copy. There are times to use someone else's pattern but there are also times to create our own. With improvisation, we riff off each others' themes or head in completely new directions. We work in a community to create something uniquely personal.

As Kaja wrote, improvisation has at least two definitions - creating spontaneously without preparation and making something from whatever is available. While I can agree with creating spontaneously from what is available, I personally doubt much is created without preparation. 

A science-fiction author recently stated that spontaneous writing only happens after days of preparation - summary, plot outline, character description, location description, and more. Similarly my filmmaking friend assures me directors deliberately choose to shoot with handheld cameras for a rough, homemade look. They don't just wake up and start filming. Afterwards, editors cut and rework these random scenes into a cohesive story. 

So how can we prepare to be improvisational? 

If you are going to create spontaneously from what's available, why don't you get reacquainted with your stash? Sort by colors; sort by theme; sort by age. What do you collect the most? What makes you smile? Your stash already describes you. Out of the entire universe of fabrics, these are the ones you chose. It's the first curation. Listen carefully because it speaks volumes.

      "There is no one alive who is Youer than You!" Dr. Suess, Happy Birthday to You!

I'm not suggesting you reorganize your entire stash immediately... or ever. I am suggesting you pull a good assortment to help you notice patterns in your choices. If you store them in different places, try getting a bit from each of them.

Next, pull out a fabric that excites you. Pin it on the wall or throw it on the floor. Then place your other fabrics next to it - especially those from a different fabric line. Take photos. Which grouping surprised you most? Excited you? Start there.

Pat it or cut it. Pin it on your wall. Make a block or make several. Make triangles, rectangles, hexagons or any other shape. Then take the next step - the one that's right for you.


We look forward to what you link up with us Tuesday, September 29.

Enjoy the day, Ann